Welcome!
Hi, Salam! We love cakes and simplicity! Cakes don't have to be fancy or rustic to taste nice though there's nothing wrong with that! Wanna cake? Feel like eating cakes? A the end of the week treat for yourself? Just as an excuse to get together with family or friends? Or a lovely surprise for a special someone? Contact us.
There also some recipes featured here, but no, no, we didn't create them. Links to the original sites are provided. If there isn't any, we are very grateful for the links but sorry that it got lost or forgotten.
Showing posts with label cake. Show all posts
Saturday, 27 June 2015
Thursday, 12 March 2015
Wednesday, 11 February 2015
Marble Cake - Again!
A friend's birthday was last week, but didn't have time to make a cake on that special day.
So instead I made one a belated one.
I baked marble cake, and used butter cream for the topping.
Marble Butter Cake
source: QL Kitchen
Ingredient
225g butter
225g sugar
225g self raising flour
4 eggs
6 Tbsp milk
2 Tbsp cocoa powder
1 tsp vanilla
Method
Cream butter and sugar until fluffy.
Add in vanilla and the eggs one at a time, beat well.
Alternate 3 Tbsp milk and flour into the mixture.
Divide the batter into 2.
Leave one plain while the other add the cocoa powder and 3 Tbsp of milk.
Mix well to combine.
In a lined and greased cake tin or loaf pan, spoon in the mixture accordingly,
you can either put four small dollop of batter in the tin or
layer it, two spoon full of each batter at a time.
Either way the cake looks good.
Use a bamboo skewer and zig zag a pattern before baking.
Bake at 180 C for 1 hour.
Once cake is cool, you can either leave it as it is or spread the icing.
Butter cream icing.
Ingredients
125g butter
70g shortening
80g icing sugar
2 Tbsp of condensed milk
1 tsp vanilla.
Food colouring.
In a clean bowl, cream the butter and shortening until turns light and fluffy.
Add the vanilla.
In two batches, add the icing sugar into the butter mixture.
Once well mix, add the remaining icing sugar, continue beating,
The mixture is smooth and spreadable.
Spread onto cake and decorate as you like.
Happy Baking.
So instead I made one a belated one.
I baked marble cake, and used butter cream for the topping.
Marble Butter Cake
source: QL Kitchen
Ingredient
225g butter
225g sugar
225g self raising flour
4 eggs
6 Tbsp milk
2 Tbsp cocoa powder
1 tsp vanilla
Method
Cream butter and sugar until fluffy.
Add in vanilla and the eggs one at a time, beat well.
Alternate 3 Tbsp milk and flour into the mixture.
Divide the batter into 2.
Leave one plain while the other add the cocoa powder and 3 Tbsp of milk.
Mix well to combine.
In a lined and greased cake tin or loaf pan, spoon in the mixture accordingly,
you can either put four small dollop of batter in the tin or
layer it, two spoon full of each batter at a time.
Either way the cake looks good.
Use a bamboo skewer and zig zag a pattern before baking.
Bake at 180 C for 1 hour.
Once cake is cool, you can either leave it as it is or spread the icing.
Butter cream icing.
Ingredients
125g butter
70g shortening
80g icing sugar
2 Tbsp of condensed milk
1 tsp vanilla.
Food colouring.
In a clean bowl, cream the butter and shortening until turns light and fluffy.
Add the vanilla.
In two batches, add the icing sugar into the butter mixture.
Once well mix, add the remaining icing sugar, continue beating,
The mixture is smooth and spreadable.
Spread onto cake and decorate as you like.
Happy Baking.
Thursday, 18 December 2014
Carrot Cake
Easy Carrot Cake.
Maybe I should change that title to the easier carrot cake - ever!
Honestly I do not like carrot cake.
But it appeals to some. My mum has been telling me to bake one like for quite a while,
but since I'm not a fan I took my time searching the internet and recipes books for a good one.
Actually I was really looking for an easy one that doesn't require much ingredients or steps.
Me being lazy ha ha ha!
I kept 'looking' until one day, mum decided that she really wanted to eat one. So off we went to a famous cake shop, I won't mention it here as I don't want to hurt people's feelings...
Bought a piece, brought it back and well needless to say mum was not pleased! Wasted a good RM 10.00 too!
So I Googled for carrot cake recipe and got several. There were even ones with pineapple!?! Wasn't this suppose to be carrot cake? So then I tried Googling easy carrot cake recipe and magically this recipe appeared!
I have baked this twice and both times it was a big hit! Mum is happy, so I'm 'happily' grating the carrots!
One thing though, at the end of the recipe there is a link to a video on youtube.
You will notice that some of the measurements for the ingredients vary. So I opt for the youtube version.
It is up to you, which one to chose, but I posted the one on youtube.
I chose a rectangular baking tin but you could easily use an 8 in round tin too!
Carrot Cake
source: all recipes uk
watch it on youtube
Ingredients
250g all purpose flour
4 eggs
300ml oil
2 tsp vanilla
2 tsp bicarbonate soda
2 tsp baking powder
1/2 tsp salt
2 tsp ground cinnamon (I skipped this)
400 g sugar (I used brown sugar)
120g chopped walnuts (I only used 100g)
350g grated carrots
Method
In a bowl, combine eggs, oil, sugar and vanilla and beat until creamy and thick.
Add in flour, baking powder, bicarbonate soda and cinnamon (If using).
Beat again.
Add in the grated carrots and walnuts. Mix to combine.
Pour into greased tin and bake at 180 C for 40-50 min.
Leave to cool in tin for 10 minutes before taking out.
Cream Cheese Topping.
125g butter
200g cream cheese
1 tsp vanilla
450g icing sugar
120g walnuts ( I skipped this)
Method
Beat cream cheese and butter until smooth and creamy.
Add in the icing sugar and beat again.
Add in the vanilla and the walnuts.
Ice the cake when it is cooled.
** I did this icing and got a lot. Too much for the cake.
In fact I could ice two cakes with one quantity of topping.
I suggest you half the recipe for a cake.
Maybe I should change that title to the easier carrot cake - ever!
Honestly I do not like carrot cake.
But it appeals to some. My mum has been telling me to bake one like for quite a while,
but since I'm not a fan I took my time searching the internet and recipes books for a good one.
Actually I was really looking for an easy one that doesn't require much ingredients or steps.
Me being lazy ha ha ha!
I kept 'looking' until one day, mum decided that she really wanted to eat one. So off we went to a famous cake shop, I won't mention it here as I don't want to hurt people's feelings...
Bought a piece, brought it back and well needless to say mum was not pleased! Wasted a good RM 10.00 too!
So I Googled for carrot cake recipe and got several. There were even ones with pineapple!?! Wasn't this suppose to be carrot cake? So then I tried Googling easy carrot cake recipe and magically this recipe appeared!
I have baked this twice and both times it was a big hit! Mum is happy, so I'm 'happily' grating the carrots!
One thing though, at the end of the recipe there is a link to a video on youtube.
You will notice that some of the measurements for the ingredients vary. So I opt for the youtube version.
It is up to you, which one to chose, but I posted the one on youtube.
I chose a rectangular baking tin but you could easily use an 8 in round tin too!
Carrot Cake
source: all recipes uk
watch it on youtube
Ingredients
250g all purpose flour
4 eggs
300ml oil
2 tsp vanilla
2 tsp bicarbonate soda
2 tsp baking powder
1/2 tsp salt
2 tsp ground cinnamon (I skipped this)
400 g sugar (I used brown sugar)
120g chopped walnuts (I only used 100g)
350g grated carrots
Method
In a bowl, combine eggs, oil, sugar and vanilla and beat until creamy and thick.
Add in flour, baking powder, bicarbonate soda and cinnamon (If using).
Beat again.
Add in the grated carrots and walnuts. Mix to combine.
Pour into greased tin and bake at 180 C for 40-50 min.
Leave to cool in tin for 10 minutes before taking out.
Cream Cheese Topping.
125g butter
200g cream cheese
1 tsp vanilla
450g icing sugar
120g walnuts ( I skipped this)
Method
Beat cream cheese and butter until smooth and creamy.
Add in the icing sugar and beat again.
Add in the vanilla and the walnuts.
Ice the cake when it is cooled.
** I did this icing and got a lot. Too much for the cake.
In fact I could ice two cakes with one quantity of topping.
I suggest you half the recipe for a cake.
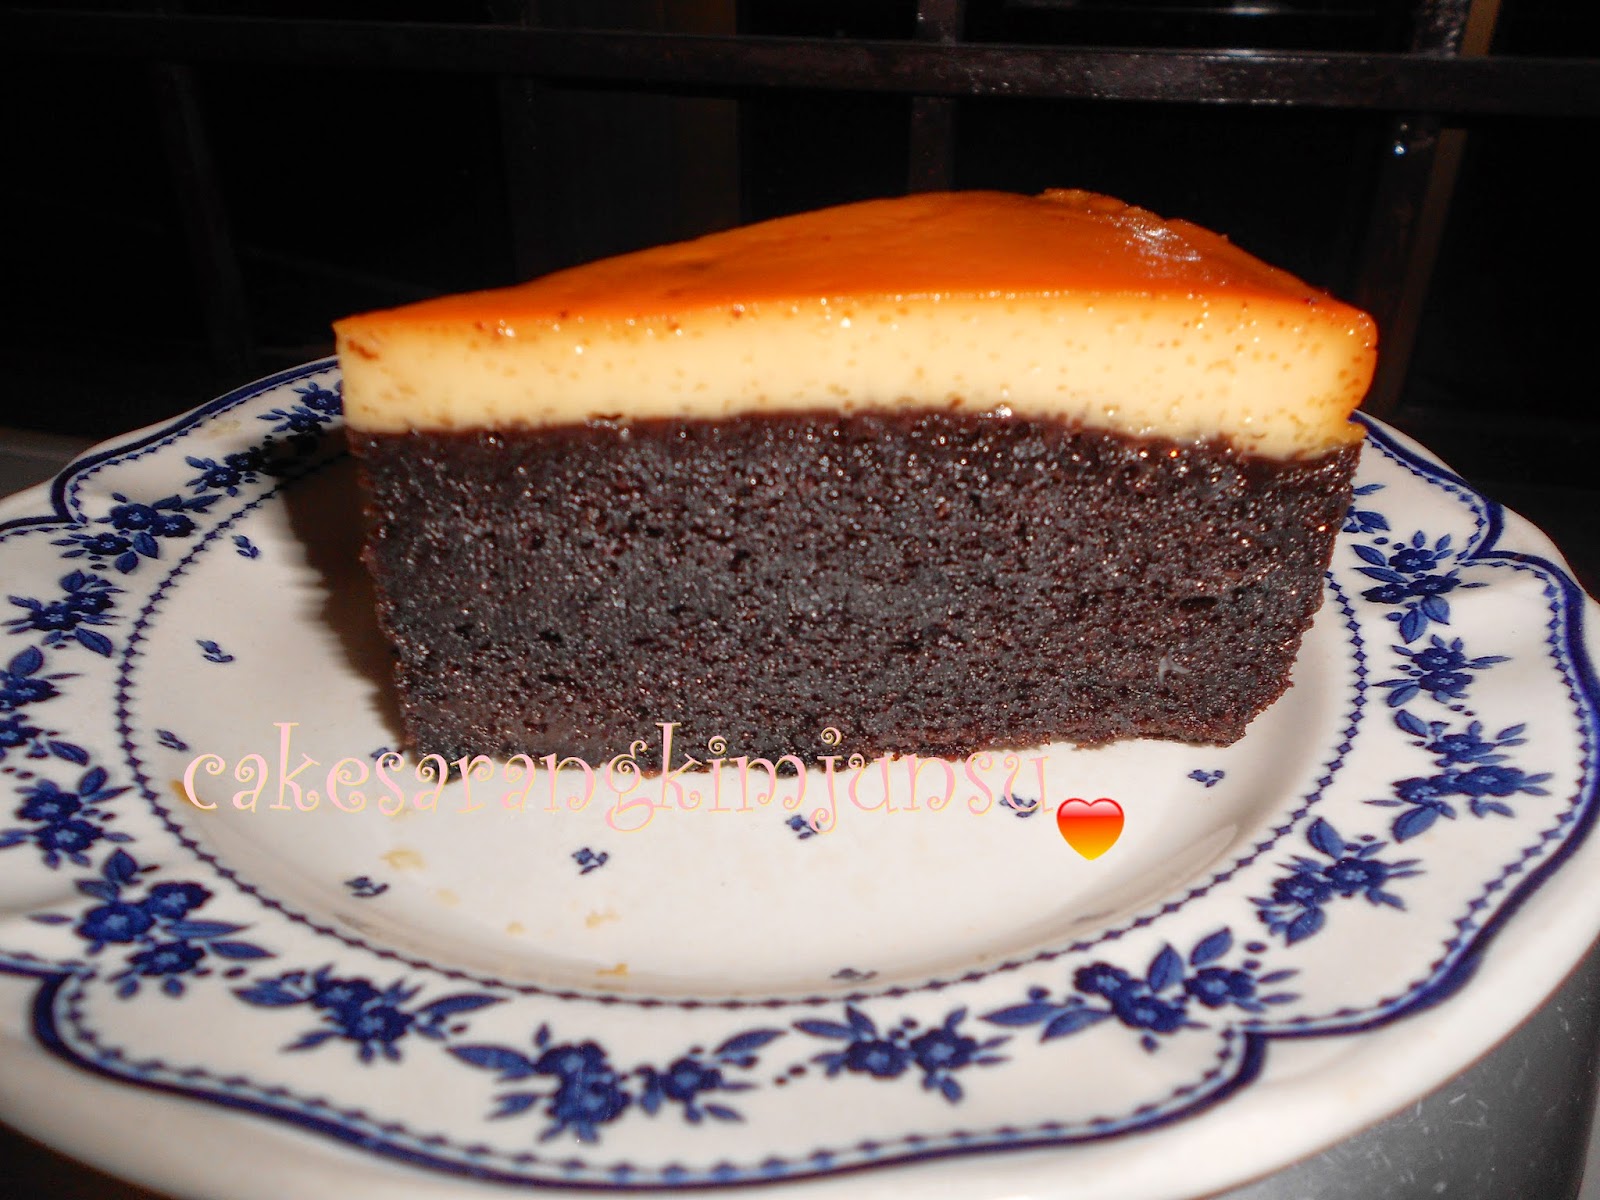
Caramel Chocolate Cake
Hmm... the name of the cake alone is already making me drool.
In fact I came across several recipes of this said cake a few times but after reading the ingredients and method I just skipped to the next recipe as I thought it was a tad tedious and hassle.
This is the sure proof that you'll never know until you try.
A few weeks ago, my brother's friend gave us several pieces of this cake.
At first I was rather skeptical, the cake looks great but I wonder does it taste great too?
After all it is a steamed cake and I don't really like steamed cakes.
But after one mouthful, I was totally convinced that I have been an idiot not to try out this recipe sooner!
Make sure your steamer is filled with water at all times and ready!
Caramel Chocolate Cake
Ingredients
2 Tbsp sugar
Sprinkle onto baking tin (8 in round tin) and slowly melt over fire until it turn brownish.
Be careful not to burn the sugar!
Put aside to cool.
For Caramel
1 cup condensed milk
1 cup evaporated milk
3 yolks
1 tsp vanilla
In a bowl combine everything, and whisk to combine.
Don't over beat, as air bubbles will make your caramel filled with holes.
Pour onto cool melted sugar and steam for 15 mins.
Once cook, take out and leave to cool for a while.
For the Chocolate Cake
A
1 cup condensed milk
1 cup evaporated milk
1 cup oil (any cooking oil will do, I used sunflower oil)
1 cup sugar
1 cup cocoa powder
Combine all the ingredients in a pot and slowly cook until it turns into a smooth paste
and warm through. Stir at all times, to avoid burning.Switch off fire and cool.
Chocolate Cake
B
4 eggs (lightly beaten)
1 cup flour
1 tsp bicarbonate soda
1 tsp baking powder
Sieve flour and both baking powder and soda . Beat the eggs.
Using a whisk, alternate the flour and eggs into the chocolate mixture.
Then slowly, using a ladle, spoon the mixture on top of the caramel layer.
Do it gently to avoid breaking the caramel.
Then steam again for 45 min to 1 hour.
Check that there is water in the steamer at all times and occasionally wipe the insides of the cover to avoid too much water dripping onto the surface of the cake.
Leave the cake to cool completely, about 2 to 3 hours before attempting to remove it from the tin.
Using a butter knife gently loosen the sides and use a plate to flip the cake as some melted sugar will drip to the sides of the cake.
Cool in the fridge or eat it.
Happy Baking.
Hmm... the name of the cake alone is already making me drool.
In fact I came across several recipes of this said cake a few times but after reading the ingredients and method I just skipped to the next recipe as I thought it was a tad tedious and hassle.
This is the sure proof that you'll never know until you try.
A few weeks ago, my brother's friend gave us several pieces of this cake.
At first I was rather skeptical, the cake looks great but I wonder does it taste great too?
After all it is a steamed cake and I don't really like steamed cakes.
But after one mouthful, I was totally convinced that I have been an idiot not to try out this recipe sooner!
Make sure your steamer is filled with water at all times and ready!
Caramel Chocolate Cake
Ingredients
2 Tbsp sugar
Sprinkle onto baking tin (8 in round tin) and slowly melt over fire until it turn brownish.
Be careful not to burn the sugar!
Put aside to cool.
For Caramel
1 cup condensed milk
1 cup evaporated milk
3 yolks
1 tsp vanilla
In a bowl combine everything, and whisk to combine.
Don't over beat, as air bubbles will make your caramel filled with holes.
Pour onto cool melted sugar and steam for 15 mins.
Once cook, take out and leave to cool for a while.
For the Chocolate Cake
A
1 cup condensed milk
1 cup evaporated milk
1 cup oil (any cooking oil will do, I used sunflower oil)
1 cup sugar
1 cup cocoa powder
Combine all the ingredients in a pot and slowly cook until it turns into a smooth paste
and warm through. Stir at all times, to avoid burning.Switch off fire and cool.
Chocolate Cake
B
4 eggs (lightly beaten)
1 cup flour
1 tsp bicarbonate soda
1 tsp baking powder
Sieve flour and both baking powder and soda . Beat the eggs.
Using a whisk, alternate the flour and eggs into the chocolate mixture.
Then slowly, using a ladle, spoon the mixture on top of the caramel layer.
Do it gently to avoid breaking the caramel.
Then steam again for 45 min to 1 hour.
Check that there is water in the steamer at all times and occasionally wipe the insides of the cover to avoid too much water dripping onto the surface of the cake.
Leave the cake to cool completely, about 2 to 3 hours before attempting to remove it from the tin.
Using a butter knife gently loosen the sides and use a plate to flip the cake as some melted sugar will drip to the sides of the cake.
Cool in the fridge or eat it.
Happy Baking.
Monday, 22 September 2014
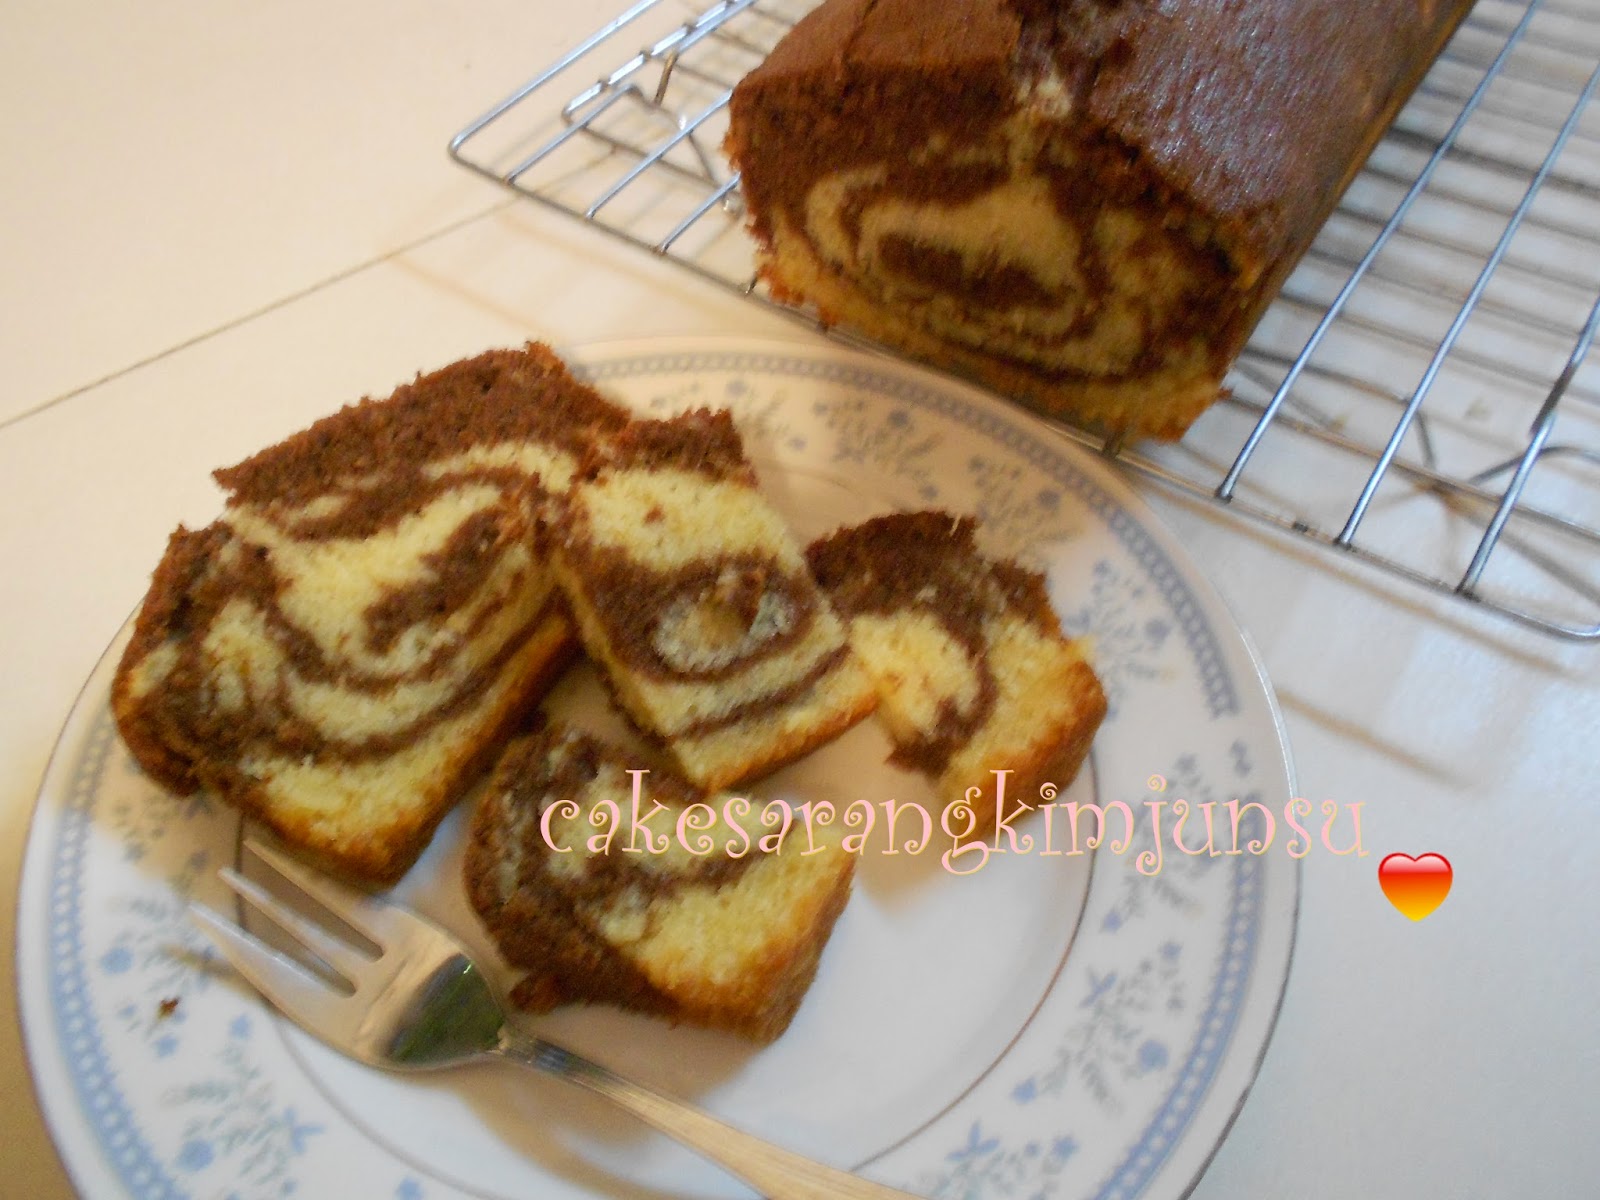
Marble Cake - another recipe
Just look at that, sedapkan?
YES! It is!
Forgive my rudeness, but you ought to give this recipe a try.
It is just perfect for lazy me. The steps and ingredients are basically easy.
Okay let's back track for a bit.
As always, me and almost everyone out there love browsing through the internet, other then their
prefixed favorite pages.
I'm no different, but I do love roaming and reading cooking blogs especially ones with recipes and good pictures. Ahem, the pictures do help!
Sometimes, it is irritating when I scroll down only to discover only pictures and no recipe *sigh* but I guess some people don't want to share or just love posting pics.
I came across this wonderful site. Not sure how I missed it before but it has some very interesting recipes.
I like the layout, very user friendly and the instructions are easy to follow. To find out more, click here -
QL Kitchen
I'm sharing their Marble Cake recipe. Try it, it is worth the time and effort.
I used a wooden spoon to beat up the butter and sugar, too lazy to take out the hand mixer.
I also added 1 tsp of Baking Powder to the flour.
I used 1 non stick loaf pan. 30cm x 11 cm, 6cm deep. I still greased and lined it with paper anyway.
The cake is light, not too sweet or greasy. The masses ate almost half! I was lucky to snap the photos before it disappeared!
Well QL Kitchen, thank you so much! I'm sharing this wonderful recipe with everyone else. This recipe is definitely a keeper!!
Marble Cake
source: QL Kitchen
Ingredients
225g butter
225g castor sugar
225g all purpose flour (to this I added 1 tsp baking powder)
4 eggs
6 Tbsp milk (I used evaporated milk)
2 heaped Tbsp cocoa (I only used 1 1/2 Tbsp)
1 tsp vanilla
Method
Cream butter and sugar. Add eggs one at a time.
Add in vanilla essence. Mix well.
Alternate the flour and 3 Tbsp milk, mix well.
Divide the batter into 2 bowls.
Leave one plain and to the other half add cocoa powder and 3 Tbsp milk.
Combine well.
Use 2 clean spoons to alternate the batter into the cake tin.
Lastly use a skewer to make marble like patterns on the top.
Bake at 180C for 45 mins - 1 hour. It depends on how many cake tins you use.
I used 1, but QL used 2 smaller ones, so the cooking times is faster.
Allow to cool before tipping it out of the cake tin and on to a cooling rack.
Happy Baking.
Sunday, 7 September 2014
Victoria Sandwich Cake
Baked this lovely all time favorite of the family and masses, Victoria Sandwich Cake.
I barely popped it out of the tins, it was still warm and Mum wanted to know if she could have a piece!
Not yet, said I as it has to cool slightly before I spread the jam and topped the other half over it!
As requested, I made the second half of chocolate.
Simply really, just add 1 Tbsp of cocoa powder with just enough water to form a paste.
Then add that to half of the batter.
Stir well to ensure all the 'white' turns chocolate.
If you want to try this lovely recipe for tea or just to eat cake, go here
Happy Baking!
I barely popped it out of the tins, it was still warm and Mum wanted to know if she could have a piece!
Not yet, said I as it has to cool slightly before I spread the jam and topped the other half over it!
As requested, I made the second half of chocolate.
Simply really, just add 1 Tbsp of cocoa powder with just enough water to form a paste.
Then add that to half of the batter.
Stir well to ensure all the 'white' turns chocolate.
If you want to try this lovely recipe for tea or just to eat cake, go here
Happy Baking!
Wednesday, 13 August 2014
Red Velvet Cake
Haven't been updating this blog for a while now.
Most common and popular excuse would be busy! Busylah LOL doing other stuff.
Recently I haven't baked anything, in fact I have been doing a lot of reading.
Sad to say nothing very intellectual but just fiction (like the Beast song) detective stories.
I love them and I think for the past weeks I have bought more books than I ever did in the past year!
Entahlah, there were loads of interesting titles simply calling out to me, you could say I could set up a mini library....
I did give up some books a month back, for a good cause tau! I mean I have reread it several times over and time to share with others. But after my numerous trips to the book shop my book shelf dah penuh balik!!
Today I did bake, had an order for 2 red velvet cakes.
Not only has it been a while since I baked but it has also been a long while since I baked red velvet, cupcakes or cake.
But thankfully I managed to finish both.
This moist and yummy recipe is from Puan Azlita. She has several version of this decadent cake but I chose the easiest one! Have a try, it is worth it.
For today's cake I didn't do her cream cheese topping, instead I opted to iced mine with butter cream instead.
Kak Ita used, two 8' tins, but I used 3.
Red Velvet Cake
source: Puan Azlita Aziz Masam Manis
360g all purpose flour
1 tsp baking soda
1 tsp bicarbonate soda
1 tsp salt
2 Tbsp cocoa powder
400g castor sugar
1 cup oil (I used sunflower oil)
2 eggs
1 cup buttermilk (1 Tbsp vinegar + 1 cup milk, allow to sit for about 5 min before using)
2 tsp vanilla
1 tsp vinegar
1 Tbsp red food coloring (this depends on the type you are using)
1/2 cup hot water (optional - you can add 1 tsp coffee to this)
Method
Sieve the flour, sodas and cocoa powder - put aside.
In a bowl mix the oil and sugar.
Then add eggs, buttermilk, vanilla and colouring. Use a spatula or whisk to mix well.
Add the hot coffee and 1 tsp vinegar.
Gradually add the dry ingredients to the liquid.
Pour the batter into prepared tins.
Bake at 180 for 20 min. This depends on your ovens.
Butter cream
125g butter
70g shortening
80g icing sugar
1/2 tsp vanilla or lemon paste
Method
Cream both butter and shortening first until fluffy.
Add the vanilla and half of the sugar. Beat again.
Add the remaining sugar when icing is creamy.
Beat again.
* If the icing is too stiff to spread add 1 or 2 tsp milk.
Spread onto cake and decorate as you like.
Happy Baking.
Most common and popular excuse would be busy! Busylah LOL doing other stuff.
Recently I haven't baked anything, in fact I have been doing a lot of reading.
Sad to say nothing very intellectual but just fiction (like the Beast song) detective stories.
I love them and I think for the past weeks I have bought more books than I ever did in the past year!
Entahlah, there were loads of interesting titles simply calling out to me, you could say I could set up a mini library....
I did give up some books a month back, for a good cause tau! I mean I have reread it several times over and time to share with others. But after my numerous trips to the book shop my book shelf dah penuh balik!!
Today I did bake, had an order for 2 red velvet cakes.
Not only has it been a while since I baked but it has also been a long while since I baked red velvet, cupcakes or cake.
But thankfully I managed to finish both.
This moist and yummy recipe is from Puan Azlita. She has several version of this decadent cake but I chose the easiest one! Have a try, it is worth it.
For today's cake I didn't do her cream cheese topping, instead I opted to iced mine with butter cream instead.
Kak Ita used, two 8' tins, but I used 3.
Red Velvet Cake
source: Puan Azlita Aziz Masam Manis
360g all purpose flour
1 tsp baking soda
1 tsp bicarbonate soda
1 tsp salt
2 Tbsp cocoa powder
400g castor sugar
1 cup oil (I used sunflower oil)
2 eggs
1 cup buttermilk (1 Tbsp vinegar + 1 cup milk, allow to sit for about 5 min before using)
2 tsp vanilla
1 tsp vinegar
1 Tbsp red food coloring (this depends on the type you are using)
1/2 cup hot water (optional - you can add 1 tsp coffee to this)
Method
Sieve the flour, sodas and cocoa powder - put aside.
In a bowl mix the oil and sugar.
Then add eggs, buttermilk, vanilla and colouring. Use a spatula or whisk to mix well.
Add the hot coffee and 1 tsp vinegar.
Gradually add the dry ingredients to the liquid.
Pour the batter into prepared tins.
Bake at 180 for 20 min. This depends on your ovens.
Butter cream
125g butter
70g shortening
80g icing sugar
1/2 tsp vanilla or lemon paste
Method
Cream both butter and shortening first until fluffy.
Add the vanilla and half of the sugar. Beat again.
Add the remaining sugar when icing is creamy.
Beat again.
* If the icing is too stiff to spread add 1 or 2 tsp milk.
Spread onto cake and decorate as you like.
Happy Baking.
Sunday, 27 July 2014
Moist Chocolate Cake
Out of the blue suddenly mum wanted a chocolate cake for Raya.
So I whipped this up in a jiffy, as you can see the result is not so good but the taste it!
That is important! LOL
This time I chose an rectangular cake tin instead of the usual round one.
As it is easier to cut to smaller pieces, lagi pun most people just want "A small piece"!!
Want to try the recipe?
The recipe for this is here
For the icing I opted for a different one, as I didn't have any cream at home.
Icing
Ingredients
4 oz of icing sugar (sieved)
1 1/2 oz butter (at room temperature)
1 1/2 oz cocoa (sieved)
enough milk
Method
In a bowl combine all ingredients except for milk.
Mix well to form a paste, then slowly add the milk until the icing is smooth and spreadable.
Once the cake is cooled, cover the cake with the icing and decorate as you like.
Happy Baking.
So I whipped this up in a jiffy, as you can see the result is not so good but the taste it!
That is important! LOL
This time I chose an rectangular cake tin instead of the usual round one.
As it is easier to cut to smaller pieces, lagi pun most people just want "A small piece"!!
Want to try the recipe?
The recipe for this is here
For the icing I opted for a different one, as I didn't have any cream at home.
Icing
Ingredients
4 oz of icing sugar (sieved)
1 1/2 oz butter (at room temperature)
1 1/2 oz cocoa (sieved)
enough milk
Method
In a bowl combine all ingredients except for milk.
Mix well to form a paste, then slowly add the milk until the icing is smooth and spreadable.
Once the cake is cooled, cover the cake with the icing and decorate as you like.
Happy Baking.
Friday, 11 April 2014
Marble Cake
Last week I was feeling really horrible, I had a bad bout of the flu and my throat felt itchy, my head felt heavy, my whole body ached and my nose was runny. Despite all that I decided to bake a cake! I know some weirdness must have taken over the rational part of my brain... and it had to be a Marble Cake, not quite sure why but I just felt like having some and besides my mum loves this cake as well.
I didn't bake using the old recipe but instead I opted for a butter cake one, and added some cocoa powder to a portion to marble it!
I must admit not the best of pics but I wasn't feeling very best either. I snapped theses after the masses gobbled up half of the loaf!
I found the original recipe at Joy of Baking but marbled it to my taste.
Butter Cake (marble cake)
source: Joy of Baking.
250g self raising flour
230g butter
300g sugar (I used 230g)
3 eggs
2 tsp vanilla
240ml buttermilk (measure milk and add in 1 Tbsp vinegar and let it sit for 20-30 min)
Method
Cream butter until creamy. Add sugar and continue beating until light and fluffy.
Add in one egg at a time, beat well. Add in vanilla.
Alternate flour and buttermilk.
Don't overmix.
Divide the batter into 2. 2/3 plain and 1/3 add 2 Tbsp of cocoa powder.
Spoon the batter layer by layer or pour half of the plain batter into the tin and drop several spoonfuls of the chocolate then cover with the rest of the plain batter.
Bake at 180C for 40 min.
I used a long loaf like tin but you can use a 8 in round tin too.
Happy Baking.
I didn't bake using the old recipe but instead I opted for a butter cake one, and added some cocoa powder to a portion to marble it!
I must admit not the best of pics but I wasn't feeling very best either. I snapped theses after the masses gobbled up half of the loaf!
I found the original recipe at Joy of Baking but marbled it to my taste.
Butter Cake (marble cake)
source: Joy of Baking.
250g self raising flour
230g butter
300g sugar (I used 230g)
3 eggs
2 tsp vanilla
240ml buttermilk (measure milk and add in 1 Tbsp vinegar and let it sit for 20-30 min)
Method
Cream butter until creamy. Add sugar and continue beating until light and fluffy.
Add in one egg at a time, beat well. Add in vanilla.
Alternate flour and buttermilk.
Don't overmix.
Divide the batter into 2. 2/3 plain and 1/3 add 2 Tbsp of cocoa powder.
Spoon the batter layer by layer or pour half of the plain batter into the tin and drop several spoonfuls of the chocolate then cover with the rest of the plain batter.
Bake at 180C for 40 min.
I used a long loaf like tin but you can use a 8 in round tin too.
Happy Baking.
Oreo Cake
I doubled the recipe for this order as the customer wanted a larger cake.
I piped purple dots on top of the star points for contrast and chocolate curls on the centre.
Almond Butterscotch Cake
Last week I had lunch with my sister at Secret Recipe. Now I wouldn't normally eat lunch there, but on that particular day hehehe... just felt like it. Our usually haunts didn't appeal to us and we thought - Secret Recipe, why not?
The last time I went there was last year, and had a very dry and rather stale brownie. Needless to say I vowed never to return there again but never say never ...
So we settled down and studied the given menu. To be honest we, when we do go there, only eat cake. But after browsing through the appetizing pics, the food doesn't look too bad. We ordered fish.
Pretty boring huh? But it wasn't.
I had fish and chips, I know pretty ordinary but safe.
My sister had baked fish and mozzarella cheese, I can't remember the exact name, but this pretty much describe the dish.
Sedaps!! My fish and chips was pipping hot went it arrived at the table. The wedge of lemon was very juicy, there was just enough tartar sauce and the salad was perfectly dressed. Not overly like some places that literally drown the poor vegetables.
My sister punya fish was delicious says she. Once more they were very generous with the portions, the cheese was cheesy! Chunks of deep fried yellow and green zucchini and potatoes accompanied the fish.
Since mine was part of the lunch deal, it came with iced lemon tea but sister ordered hot lemon tea - ok we were both coughing at that time. It was a sedap kenyang lunch and would I go and there again? Yep, just stay away from the brownies.
Okey enough of that I had an order for a cake, Almond Butterscotch. I was busy that week but I accepted the order anyway, rezeki jangan tolak!!
I had to carefully plan when to bake the cake, as the cake requires time to assemble and set. Happy to say I did well, I have only baked this cake three times so far!! The nervous bit is making the butterscotch, ada sekali tu tak jadi and I didn't want to waste ingredients! Thank God all went well and I hoped Aishah and her family had a good time eating it. The Ben 10 was a bonus as her son loved the cartoon.
I posted the recipe here, if you're interested take a look! It's quite easy.
The last time I went there was last year, and had a very dry and rather stale brownie. Needless to say I vowed never to return there again but never say never ...
So we settled down and studied the given menu. To be honest we, when we do go there, only eat cake. But after browsing through the appetizing pics, the food doesn't look too bad. We ordered fish.
Pretty boring huh? But it wasn't.
I had fish and chips, I know pretty ordinary but safe.
My sister had baked fish and mozzarella cheese, I can't remember the exact name, but this pretty much describe the dish.
![]() |
| Fish and Chips |
| ||
| Baked Fish with Mozzarella Cheese |
Sedaps!! My fish and chips was pipping hot went it arrived at the table. The wedge of lemon was very juicy, there was just enough tartar sauce and the salad was perfectly dressed. Not overly like some places that literally drown the poor vegetables.
My sister punya fish was delicious says she. Once more they were very generous with the portions, the cheese was cheesy! Chunks of deep fried yellow and green zucchini and potatoes accompanied the fish.
Since mine was part of the lunch deal, it came with iced lemon tea but sister ordered hot lemon tea - ok we were both coughing at that time. It was a sedap kenyang lunch and would I go and there again? Yep, just stay away from the brownies.
Okey enough of that I had an order for a cake, Almond Butterscotch. I was busy that week but I accepted the order anyway, rezeki jangan tolak!!
I had to carefully plan when to bake the cake, as the cake requires time to assemble and set. Happy to say I did well, I have only baked this cake three times so far!! The nervous bit is making the butterscotch, ada sekali tu tak jadi and I didn't want to waste ingredients! Thank God all went well and I hoped Aishah and her family had a good time eating it. The Ben 10 was a bonus as her son loved the cartoon.
I posted the recipe here, if you're interested take a look! It's quite easy.
Tuesday, 4 March 2014
Moist Chocolate Cake
I was feeling rather hungry and I only got a small piece of the birthday cake. There were a lot of people and tak kanlah I want to eat a big piece just because I baked it!!
The next day I felt like eating cake, so after deciding on which recipe I wanted I checked and made sure I had all the ingredients at home before taking out the baking tins.
Nothing is more sad when you realize after all the excitement and hype that you don't have enough of something or that something memang tak ada at home! Nak go to the shop, malas. But I was fortunate that everything ada!
I haven't made this chocolate cake for a while and to be honest I forgot how it tasted like. I just seldom make this because the recipe is quite big and well, that just means I have to eat more - something I am desperately trying to cut down!
I left out the fudgy topping and opt for a chocolate ganache instead.
1 cup of cocoa powder (I used Meriah)
1 tsp baking powder
1 tsp bicarbonate soda
4 eggs
2 cups sugar (I lessened it to 1 3/4 cup)
1 cup condensed milk
1 cup oil (I used Daisy Corn Oil)
1 1/2 cup of boiling water (optional - add 1 tsp of instant coffee)
Method
Beat eggs and sugar with a whisk until frothy and foamy.
Add milk and oil. Mix well.
Fold in dry ingredients little by little until combined.
Lastly add in hot water.
Pour mixture into greased tins, I used two 22 cm.
Bake in oven at 175 C, for 40 min or until cooked.
Once cake cools, do the topping.
The next day I felt like eating cake, so after deciding on which recipe I wanted I checked and made sure I had all the ingredients at home before taking out the baking tins.
Nothing is more sad when you realize after all the excitement and hype that you don't have enough of something or that something memang tak ada at home! Nak go to the shop, malas. But I was fortunate that everything ada!
I haven't made this chocolate cake for a while and to be honest I forgot how it tasted like. I just seldom make this because the recipe is quite big and well, that just means I have to eat more - something I am desperately trying to cut down!
I left out the fudgy topping and opt for a chocolate ganache instead.
I used two 22 cm cake tins instead of one larger one.
For the cream in the middle, I used a few scoopfuls of the cooled ganache. I just whipped it with a whisk and then applied it to one layer before topping it with the other.
Then I poured the rest of the ganache over the cake.
A little messy I admit, but it taste much better than it looks!!
Moist Chocolate Cake
2 cups of flour (I used Tepung Gandum Blue Key)1 cup of cocoa powder (I used Meriah)
1 tsp baking powder
1 tsp bicarbonate soda
4 eggs
2 cups sugar (I lessened it to 1 3/4 cup)
1 cup condensed milk
1 cup oil (I used Daisy Corn Oil)
1 1/2 cup of boiling water (optional - add 1 tsp of instant coffee)
Method
Beat eggs and sugar with a whisk until frothy and foamy.
Add milk and oil. Mix well.
Fold in dry ingredients little by little until combined.
Lastly add in hot water.
Pour mixture into greased tins, I used two 22 cm.
Bake in oven at 175 C, for 40 min or until cooked.
Once cake cools, do the topping.
Chocolate Ganache
200ml whipping cream (I used Emborg)
300g chopped cooking chocolate (I used Meriah Dark Chocolate)
1 Tbsp butter (I didn't)
Method
Chopped the chocolate, the smaller the pieces the better and put it in a bowl.
In a pot warm the cream, once the small bubbles at the side appear, tip the bowl of chocolate into the pot.
Let it be don't stir, if some of the chocolate is not submerged, tilt or move the pot around a bit. Let it rest and after a few minutes, gently stir to mix.
Allow the ganache to cool and thicken, about 2 to 3 hours. Best to make the ganache first before the cake.
For the creamy center, I agak-agak an amount just enough to cover the cake. Wait until the ganache has thickened then take out about 8 Tbsp and whisked until it turned light brown. Whisking ganache makes it creamy and not glossy. This can also be used on cupcakes or the cake itself.
Happy Baking.
Monday, 27 January 2014
Marble Cake
Yes, yes I know this is a very 'normal' cake and seems to be easy for some but it took me quite a while to find a recipe that was actually good.
I've got one from my mum that is quite big and uses lots of eggs. I liked it but I wanted to find one that has less eggs and smaller in size too.
Finally found a good one in one of my mum's cook books. Thanks a lot mum!
This recipe calls for a bundt pan but any cake pan will do.
I omitted the orange part as my mum hates orange flavored cakes!
Chocolate Orange Marble Cake
source: The Australian Women's Weekly - Cakes and Slices Cookbook.
60g dark chocolate, chopped (I used 3 Tbsp cocoa powder and 1 Tbsp water mixed into a paste)
125g butter
1 1/2 cups sugar ( a bit sweet, next time I'll put less)
2 eggs
2 cups self raising flour
3/4 cup milk
1 Tbsp orange rind
Chocolate Fudge Frosting (I didn't do this)
125g dark chocolate
125g butter
3 1/2 cups icing sugar
3/4 cup milk
1 tsp vanilla
Method
Melt the chocolate using a double boiler and put aside to cool.
For the chocolate/cocoa paste, add the water little by little to the cocoa powder.
Make sure the paste is not too dry or too wet.
It must be free of lumps or the batter will not come out nicely.
Cream butter and sugar until light and fluffy.
Add in eggs one at a time, beating well.
Add in the flour and milk. Beat well until batter is smooth.
Divide the mixture into two bowls.
In one bowl add in the orange rind. In the other add in the cooled chocolate or the cocoa paste.
Mix each batter well.
In a grease cake tin, drop spoonfuls of the chocolate and orange batter into the
corners and middle. Keep going until all the batter is finished.
You can either use a skewer and gently run through the batter or just leave it as it is.
Gently tap the sides of the tin to release air pockets in the cake.
Bake at 170C for 40 min or until cook.
Once cake is cooled, iced the cake as you like.
Happy Baking.
I've got one from my mum that is quite big and uses lots of eggs. I liked it but I wanted to find one that has less eggs and smaller in size too.
Finally found a good one in one of my mum's cook books. Thanks a lot mum!
This recipe calls for a bundt pan but any cake pan will do.
I omitted the orange part as my mum hates orange flavored cakes!
| This is the bundt pan |
Chocolate Orange Marble Cake
source: The Australian Women's Weekly - Cakes and Slices Cookbook.
60g dark chocolate, chopped (I used 3 Tbsp cocoa powder and 1 Tbsp water mixed into a paste)
125g butter
1 1/2 cups sugar ( a bit sweet, next time I'll put less)
2 eggs
2 cups self raising flour
3/4 cup milk
1 Tbsp orange rind
Chocolate Fudge Frosting (I didn't do this)
125g dark chocolate
125g butter
3 1/2 cups icing sugar
3/4 cup milk
1 tsp vanilla
Method
Melt the chocolate using a double boiler and put aside to cool.
For the chocolate/cocoa paste, add the water little by little to the cocoa powder.
Make sure the paste is not too dry or too wet.
It must be free of lumps or the batter will not come out nicely.
Cream butter and sugar until light and fluffy.
Add in eggs one at a time, beating well.
Add in the flour and milk. Beat well until batter is smooth.
Divide the mixture into two bowls.
In one bowl add in the orange rind. In the other add in the cooled chocolate or the cocoa paste.
Mix each batter well.
In a grease cake tin, drop spoonfuls of the chocolate and orange batter into the
corners and middle. Keep going until all the batter is finished.
You can either use a skewer and gently run through the batter or just leave it as it is.
Gently tap the sides of the tin to release air pockets in the cake.
Bake at 170C for 40 min or until cook.
Once cake is cooled, iced the cake as you like.
Happy Baking.
Friday, 17 January 2014
Millie Crepe
To err is human. The first time I heard this was when Capt. Jean-Luc Picard mentioned it on an episode of Star Trek-The Next Generation. (I loved that series and miss it.)
And indeed as a human being I made a terrible mistake copying a recipe and as a result my Millie Crepe ... Tak jadi.
But the masses all agreed that it tasted good, despite its appearance T..T
My fault really, I should have double checked before starting. It's like this, I normally chose which recipes I want to try out and then I copy it by hand from the blog. Sometimes I copy several at once, and only try it out days later, after all lecehlah to switch on the lap top just to find a recipe before I start baking.
What on earth am I rambling about, you might wonder. Well first let me 'show off' my millie crepe.
Unfortunately it isn't a thousand layers like the namesake but let it be a lesson to me to always double check the ingredients, especially the measurements!!
I found this wonderful recipe from ABM's blog. Terima kasih banyak-banyak, ya!! Compare his lovely looking crepe to mine and slowly pass out from laughing. Mine is awful where else he's looks fantastic....when will I get to that level?
But overall it is rather easy, you don't need an oven but a whole lotta patience. The prep for this recipe is quite a lot but it is worth it. Practice makes perfect, so they say ^ ^ Trylah :DD
Millie Crepe with Vanilla Cream Custard.
source: ABM
For the crepe
140g self raising flour
a pinch of salt
20g corn flour (about 1 Tbsp)
80g castor sugar
500ml milk
30g butter (melted)
4 egg yolks
1 tsp vanilla essence
For the filling
This custard is what ABM calls the eggless one.
I did this one.
500ml milk
3 1/2 Tbsp custard powder
85g castor sugar (ABM used 100g but I used 85g)
2 Tbsp butter
1 tsp vanilla
200-250ml non dairy whipping cream
or if you like you can also try what ABM calls the eggy one
450ml milk
2 Tbsp all purpose flour
1 1/2 Tbsp corn flour
85g castor sugar
4 egg yolks
2 Tbsp butter
1 tsp vanilla
a pinch of salt
200 ml non dairy whipping cream
Method
Crepe
In bowl combine flour, cornflour and salt with 250ml milk. Add milk gradually to avoid lumps.
In another bowl whisk the egg yolks, sugar and 250ml milk.
Pour the egg mixture into the flour batter.
At this point ABM added a little bit more flour to his batter, so I did too.
Add the melted butter and vanilla. Mix well.
Sieve the batter, leave to rest in the fridge for 30 mins. (any longer thickens the batter)
**Before you begin, make sure you get all your stuff ready. You'll need a non stick pan, a plate, some butter or oil, a spatula, a small ladle, sheets of plastic or a roll of cling wrap and don't forget your patience.
I used a 20 in non stick pan to make the crepes. They say non stick, but it does stick so use a little bit of oil or butter each time you make a new crepe.
Heat the pan first then turn the heat to low. Ladle the batter onto the pan and slowly rotate the pan so that the batter covers entire surface evenly. Believe me at first it is hard but not for long.
After a few minutes, the surface of the crepe will look 'dry' and small air pockets will appear now slowly flipped one corner to check if the crepe is slightly brown underneath. If it is, time to remove it from the pan. No need to cook both sides of the crepe.
Using a spatula gently put it on a plate and cover immediately with cling wrap or a plastic sheet.
This is to avoid the crepe drying and sticking to its friends later.
Keep going until all the batter is finish. Leave the crepes covered to cool.
Filling
And now off to cook the filling. I used the eggless custard recipe. For the eggy custard please refer here.
This is where I went wrong. Instead of 3 1/2 Tbsp of custard powder, silly me only used 3 1/2 tsp (!!), so that is why my filling is running.
Okay, in a pot combine milk, custard powder, sugar and salt. Mix well and cook over low heat.
Add in the butter and continue cooking and stirring until it thickens. Beware this burns easily. Add in vanilla.
Take off the heat and leave to cool.
In a chilled bowl, whipped the cream until soft peaks. Gently stir in the cooled custard into the cream.
And now it is ready.
To assemble
I didn't use a sponge cake as a base, instead did mine all with just crepes.
I lay one crepe on the board and covered it with the filling before topping it with another piece of crepe.
Keep repeating the process until the last piece. Leave the top free of filling leaving it as it is or decorate with some fresh fruits.
Once done, carefully cover your crepes with cling wrap and put it in the fridge for the cream filling to hardened.
Leave it for a couple of hours or better still overnight.
I didn't count how many layers I made but I think it was more than 10.
Will do better next crepes.
Happy Baking.
And indeed as a human being I made a terrible mistake copying a recipe and as a result my Millie Crepe ... Tak jadi.
But the masses all agreed that it tasted good, despite its appearance T..T
My fault really, I should have double checked before starting. It's like this, I normally chose which recipes I want to try out and then I copy it by hand from the blog. Sometimes I copy several at once, and only try it out days later, after all lecehlah to switch on the lap top just to find a recipe before I start baking.
What on earth am I rambling about, you might wonder. Well first let me 'show off' my millie crepe.
Unfortunately it isn't a thousand layers like the namesake but let it be a lesson to me to always double check the ingredients, especially the measurements!!
I found this wonderful recipe from ABM's blog. Terima kasih banyak-banyak, ya!! Compare his lovely looking crepe to mine and slowly pass out from laughing. Mine is awful where else he's looks fantastic....when will I get to that level?
But overall it is rather easy, you don't need an oven but a whole lotta patience. The prep for this recipe is quite a lot but it is worth it. Practice makes perfect, so they say ^ ^ Trylah :DD
| bolehlah kan? |
| pretty still ne? |
| by the time this one was snapped you can see the filling melting! |
Millie Crepe with Vanilla Cream Custard.
source: ABM
For the crepe
140g self raising flour
a pinch of salt
20g corn flour (about 1 Tbsp)
80g castor sugar
500ml milk
30g butter (melted)
4 egg yolks
1 tsp vanilla essence
For the filling
This custard is what ABM calls the eggless one.
I did this one.
500ml milk
3 1/2 Tbsp custard powder
85g castor sugar (ABM used 100g but I used 85g)
2 Tbsp butter
1 tsp vanilla
200-250ml non dairy whipping cream
or if you like you can also try what ABM calls the eggy one
450ml milk
2 Tbsp all purpose flour
1 1/2 Tbsp corn flour
85g castor sugar
4 egg yolks
2 Tbsp butter
1 tsp vanilla
a pinch of salt
200 ml non dairy whipping cream
Method
Crepe
In bowl combine flour, cornflour and salt with 250ml milk. Add milk gradually to avoid lumps.
In another bowl whisk the egg yolks, sugar and 250ml milk.
Pour the egg mixture into the flour batter.
At this point ABM added a little bit more flour to his batter, so I did too.
Add the melted butter and vanilla. Mix well.
Sieve the batter, leave to rest in the fridge for 30 mins. (any longer thickens the batter)
**Before you begin, make sure you get all your stuff ready. You'll need a non stick pan, a plate, some butter or oil, a spatula, a small ladle, sheets of plastic or a roll of cling wrap and don't forget your patience.
I used a 20 in non stick pan to make the crepes. They say non stick, but it does stick so use a little bit of oil or butter each time you make a new crepe.
Heat the pan first then turn the heat to low. Ladle the batter onto the pan and slowly rotate the pan so that the batter covers entire surface evenly. Believe me at first it is hard but not for long.
After a few minutes, the surface of the crepe will look 'dry' and small air pockets will appear now slowly flipped one corner to check if the crepe is slightly brown underneath. If it is, time to remove it from the pan. No need to cook both sides of the crepe.
Using a spatula gently put it on a plate and cover immediately with cling wrap or a plastic sheet.
This is to avoid the crepe drying and sticking to its friends later.
Keep going until all the batter is finish. Leave the crepes covered to cool.
Filling
And now off to cook the filling. I used the eggless custard recipe. For the eggy custard please refer here.
This is where I went wrong. Instead of 3 1/2 Tbsp of custard powder, silly me only used 3 1/2 tsp (!!), so that is why my filling is running.
Okay, in a pot combine milk, custard powder, sugar and salt. Mix well and cook over low heat.
Add in the butter and continue cooking and stirring until it thickens. Beware this burns easily. Add in vanilla.
Take off the heat and leave to cool.
In a chilled bowl, whipped the cream until soft peaks. Gently stir in the cooled custard into the cream.
And now it is ready.
To assemble
I didn't use a sponge cake as a base, instead did mine all with just crepes.
I lay one crepe on the board and covered it with the filling before topping it with another piece of crepe.
Keep repeating the process until the last piece. Leave the top free of filling leaving it as it is or decorate with some fresh fruits.
Once done, carefully cover your crepes with cling wrap and put it in the fridge for the cream filling to hardened.
Leave it for a couple of hours or better still overnight.
I didn't count how many layers I made but I think it was more than 10.
Will do better next crepes.
Happy Baking.
Sunday, 12 January 2014
Oreo Cake
The need to try a new recipe, or the need for a new post for the blog or just the need to eat cake. Which one is it? Hmm...
Which ever the need or the excuse I ventured to the kitchen yesterday afternoon to try a recipe I have been eyeing for quite a while.
Thanks to Mat Gebu for sharing this delicious recipe. He made his into cupcakes but I plonked mine into a baking tin and made it into a cake instead. I believe the taste is the same just the shape and size yang different.
Today I was in a lazy mood. Didn't bother or feel like using the hand mixer. Instead I baked this cake literally using my hands, er... a wooden spoon and hand whisk that is!
The cake is easy and quick to make, provided you have all the ingredients, crushing the cookies took the longest... The masses loved it, even my mum who does NOT like oreos. Another addition to my collection of cakes that's easy and yummy. In the end my cake looks a bit messy but nak cepat makan!
And here is the recipe, and just like Mat Gebu said "paling senang" and it is!
Oreo Cupcakes.
source: Mat Gebu
125g butter
1/2 cup brown sugar
1 cup Self Raising Flour
1/2 tsp baking powder
2 eggs
1/2 tsp vanilla
5 pieces of oreo biscuits (I used 6 pieces - 1 piece is two halves sandwiched with cream)
Method
In a bowl beat butter, eggs, brown sugar, flour, baking powder and vanilla.
Beat at medium speed for about 2 minutes. Do not over beat.
Crush the biscuits with the cream using a food processor ( I bashed them with the end of my rolling pin)
Add the crushed biscuits to the batter and mix well.
Pour the batter into paper cups (If you are making cupcakes) or a lined greased tin.
I used a 6 in x 2.5 in round cake tin.
Bake at 160C for about 30 min or until the cake is cook.
Butter Cream
125g butter
70g creamwell or shortening (I used shortening)
80g icing sugar
1/2 tsp vanilla
2 Tbsp condensed milk.
Method
Cream butter and creamwell until fluffy, Add in icing sugar, vanilla and milk.
Continue beating until it turns pale and creamy.
Assembling the cake.
Once the cake is cooled, slice the cake into two.
Spread the butter cream on one half before topping it with the other.
Cover the rest of the cake with the remaining cream.
Sprinkle the crushed biscuits over the cake or use fresh fruits and edible glitter if you like.
Happy Baking.
Which ever the need or the excuse I ventured to the kitchen yesterday afternoon to try a recipe I have been eyeing for quite a while.
Thanks to Mat Gebu for sharing this delicious recipe. He made his into cupcakes but I plonked mine into a baking tin and made it into a cake instead. I believe the taste is the same just the shape and size yang different.
Today I was in a lazy mood. Didn't bother or feel like using the hand mixer. Instead I baked this cake literally using my hands, er... a wooden spoon and hand whisk that is!
The cake is easy and quick to make, provided you have all the ingredients, crushing the cookies took the longest... The masses loved it, even my mum who does NOT like oreos. Another addition to my collection of cakes that's easy and yummy. In the end my cake looks a bit messy but nak cepat makan!
And here is the recipe, and just like Mat Gebu said "paling senang" and it is!
Oreo Cupcakes.
source: Mat Gebu
125g butter
1/2 cup brown sugar
1 cup Self Raising Flour
1/2 tsp baking powder
2 eggs
1/2 tsp vanilla
5 pieces of oreo biscuits (I used 6 pieces - 1 piece is two halves sandwiched with cream)
Method
In a bowl beat butter, eggs, brown sugar, flour, baking powder and vanilla.
Beat at medium speed for about 2 minutes. Do not over beat.
Crush the biscuits with the cream using a food processor ( I bashed them with the end of my rolling pin)
Add the crushed biscuits to the batter and mix well.
Pour the batter into paper cups (If you are making cupcakes) or a lined greased tin.
I used a 6 in x 2.5 in round cake tin.
Bake at 160C for about 30 min or until the cake is cook.
Butter Cream
125g butter
70g creamwell or shortening (I used shortening)
80g icing sugar
1/2 tsp vanilla
2 Tbsp condensed milk.
Method
Cream butter and creamwell until fluffy, Add in icing sugar, vanilla and milk.
Continue beating until it turns pale and creamy.
Assembling the cake.
Once the cake is cooled, slice the cake into two.
Spread the butter cream on one half before topping it with the other.
Cover the rest of the cake with the remaining cream.
Sprinkle the crushed biscuits over the cake or use fresh fruits and edible glitter if you like.
Happy Baking.
Wednesday, 25 December 2013
Victoria Sandwich Cake
My sister wanted a cake for ... Christmas. We don't celebrate it but like all Malaysian and all the festivals in our dear country (1 Malaysia), in a way we all do.
I have never done a Christmas cake before, but there is a first time for everything, so here goes.
After deciding which cake she wanted we went on our way to buy decorations for the cake since the ingredients all memang dah ada kat rumah. Bought a ready man 'snowman' made of sugar at Bakewell.
I thought of building a Christmas tree using skittles but to my dismay when it was time to decorate the cake I bought the large ones instead. Which was way too big for my small cake.
So then we decided to just draw the outline of the cake with green icing, and use Nestle Crunch Wafer as the tree trunk. Mum suggested we used the colored sugar balls as ornaments for the tree! Thanks a lot Ma! We were already at our wits end at how else to decorate the cake.
The skittles, in the end we just ate it as it is! LOL
The cake is the Victoria Sandwich cake, I just doubled it. But for the bottom layer I added a Tbsp of cocoa powder, just for contrast instead of the cake being all white. I used Tesco Bramble Jelly for the filling, it tastes a bit tart but perfect for the cake. A dusting of icing sugar was the base of the cake before I piped icing.
I have never done a Christmas cake before, but there is a first time for everything, so here goes.
After deciding which cake she wanted we went on our way to buy decorations for the cake since the ingredients all memang dah ada kat rumah. Bought a ready man 'snowman' made of sugar at Bakewell.
I thought of building a Christmas tree using skittles but to my dismay when it was time to decorate the cake I bought the large ones instead. Which was way too big for my small cake.
So then we decided to just draw the outline of the cake with green icing, and use Nestle Crunch Wafer as the tree trunk. Mum suggested we used the colored sugar balls as ornaments for the tree! Thanks a lot Ma! We were already at our wits end at how else to decorate the cake.
The skittles, in the end we just ate it as it is! LOL
The cake is the Victoria Sandwich cake, I just doubled it. But for the bottom layer I added a Tbsp of cocoa powder, just for contrast instead of the cake being all white. I used Tesco Bramble Jelly for the filling, it tastes a bit tart but perfect for the cake. A dusting of icing sugar was the base of the cake before I piped icing.
Friday, 20 December 2013
Birthday cake

I baked a rather belated birthday for a friend.
Hoped she enjoyed it!
This time I chose the Almond Butterscotch Cake. Unlike my first attempt, I added in more butterscotch into the fresh cream and less in the middle and it tasted ... according to reliable sources delicious! LOL, definitely a case of masuk bakul sendiri!!
Monday, 2 December 2013
Spongy Banana Cake
I found this recipe by mistake. I was actually looking for something else, biasalah and I got 'lost' in my search and ended up with this.
I thought it was easy and since we had some bananas that no one wanted to eat anymore. Daripada the banana going mushy and to waste, this is a good way to use it. I know banana cake is a bit ordinary and vastly available at almost all shops and even KK Mart (24/7)!
But if you want something homemade that is easy to bake and doesn't have an over dose of essence or taste of soda, try this.
Spongy Banana Cake.
source: Masam Manis Cooking with Love
150g ripe bananas (mashed)
200g all purpose flour (I use Tepung Gandum Blue Key)
160g castor sugar
3 eggs
120ml oil (I use corn oil, but you can also use cooking oil)
1 Tbsp ovalette
1 tsp baking soda
1 tsp bicarbonate of soda
1 tsp vanilla
Method
Mashed the bananas using a fork or a blender if you are in a hurry.
Put all the ingredients in a bowl and mix well until mixture is very thick and fluffy.
You need to really beat the mixture for the cake to be nice and spongy.
Next pour the mixture into an 8 in greased and lined cake tin.
Bake for 45 min - 1 hour at 170 C.
I know it sounds like a long time, but I tried this recipe and it does take that long.
Rest assure, your patience will be rewarded!!
Happy Baking.
I thought it was easy and since we had some bananas that no one wanted to eat anymore. Daripada the banana going mushy and to waste, this is a good way to use it. I know banana cake is a bit ordinary and vastly available at almost all shops and even KK Mart (24/7)!
But if you want something homemade that is easy to bake and doesn't have an over dose of essence or taste of soda, try this.
Spongy Banana Cake.
source: Masam Manis Cooking with Love
150g ripe bananas (mashed)
200g all purpose flour (I use Tepung Gandum Blue Key)
160g castor sugar
3 eggs
120ml oil (I use corn oil, but you can also use cooking oil)
1 Tbsp ovalette
1 tsp baking soda
1 tsp bicarbonate of soda
1 tsp vanilla
Method
Mashed the bananas using a fork or a blender if you are in a hurry.
Put all the ingredients in a bowl and mix well until mixture is very thick and fluffy.
You need to really beat the mixture for the cake to be nice and spongy.
Next pour the mixture into an 8 in greased and lined cake tin.
Bake for 45 min - 1 hour at 170 C.
I know it sounds like a long time, but I tried this recipe and it does take that long.
Rest assure, your patience will be rewarded!!
Happy Baking.
Subscribe to:
Posts (Atom)