Pages

Welcome!

Hi, Salam! We love cakes and simplicity! Cakes don't have to be fancy or rustic to taste nice though there's nothing wrong with that! Wanna cake? Feel like eating cakes? A the end of the week treat for yourself? Just as an excuse to get together with family or friends? Or a lovely surprise for a special someone? Contact us.
There also some recipes featured here, but no, no, we didn't create them. Links to the original sites are provided. If there isn't any, we are very grateful for the links but sorry that it got lost or forgotten.
Showing posts with label recipe. Show all posts

Friday, 2 October 2015

Birthday Cake

Yet another Frozen birthday cake.
Nope not complaining, in fact it is pretty easy compared to the ones using gum paste or fondant.
I mean sure it looks good and everything but eating it... ummm??
I like the edible images, limited sometimes but it works for me.

Never mind, each to their own taste and preferences.

As requested, the icing is buttercream, and baby pink. Although I noticed most Frozen cakes are either pale blue or white - snow or maybe to resemble ice??
No matter, I do as I am told LOL so pink it was, after all the birthday cake was for a cute little girl.

For the decoration, I piped pink stars at the border and topped them with colourful silver, gold, pink and blue balls. For the rest of the cake I used sugar craft (not made by me, but bought at Bakewell) butterflies, colourful chocolate sprinkles and of course the cast of the famous Disney animation - Frozen.

The  cake itself was chocolate sponge cake, again by request. It was a four layered cake, (2 recipes of said cake) using square shallow 12x12 in cake pan. I trimmed the edges slightly to fit the 11x11 in cake board.

Happy Birthday Putri!!


Thursday, 2 July 2015

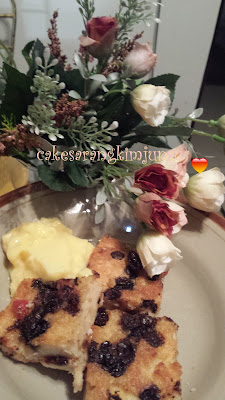
Bread Pudding

Another weakness during the fasting month.
Not a must have but a must eat at least once!
I was cleaning the fridge, throwing out what should have been ages ago!
I came across bread, burger buns actually. There were bought on a whim, at RM 1 per packet.
You know at the supermarkets when they mark down the prices of goods that are expiring?
Well, we kinda got carried away and bought some, then didn't quite know what to do with so much once we got home and ate half of it.

Despite being a stale and rather hard, this is when the egg mixture comes in handy, I managed to convert it into this delicious dessert.
I found an easy recipe on Mat Gebu's blog. But he did his with Butterscotch bread, now I had burger buns.
I trimmed the crusts a bit, tweaked the recipe a bit and doubled it.
Mat Gebu didn't butter his bread but I did. I think it makes it tastier.
A good dish to bring over to friend's, that is when you get invited for break fast or dinner or tea or lunch...


Butterscotch Bread Pudding
source: Dapur Tanpa Sempadan

Ingredients
5 pieces of bread (you can use whatever you want)
2 Tbsp chocolate chips
Chopped Raisin  & Cherries (I added this)
Chopped Almonds or Walnuts (I added this)
1 cup milk
1 egg (beaten)
1 Tbsp castor sugar
1 Tbsp melted butter
1 tsp vanilla

Method
Greased an oven proof container or baking tin.
Whisk together eggs, sugar, vanilla, milk and melted butter. Put aside.
Butter the bread. Line half of the bread in the tin. Sprinkle the chocolate chips, raisin, cherries and nuts on the bread and pour half the eggy mixture over the bread.
Now line the rest of the bread and sprinkle the remaining chocolate chips, raisins, cherries and nuts.
Pour the rest of the eggy mixture. Using a spoon gently press down the pudding.
This is to ensure everything gets covered with the egg evenly.
Let the pudding rest for about 20 to 30 min in the fridge before baking.
Bake in the oven using a ban marie or simply put the baking tin with the pudding into a bigger tin filled with water.
Bake for about 30 min at 180C.

Custard
Ingredients

1 cup milk
2 Tbsp water
1 Tbsp castor sugar
1 Tbsp custard powder
1/2 tsp vanilla

Method
In a pot combine all the ingredients and cook over a slow fire.
Continue cooking until the custard thickens. Keep stirring to avoid custard being
lumpy or burned.


Cut the cooled bread pudding into squares or bite size and drizzle the custard over it.
Delicious!

Happy Baking!

Saturday, 27 June 2015

Birthday Cakes!

If only the month of June was like the rest of the year...
Hah! I wish.
For this month I baked 3 birthday cakes, yep even for me that's quite a record and achievement.
I enjoyed it but wished I had more time for the Ben 10 cake. It was a rather last minute thingy... but I was told the birthday boy loved it and had a good time. He is only 7 and perhaps not quite aware of how horribly made the cake actually was!!

The first was a (another) Black Forest Cake, a birthday cake for my mum.
I made her one last year and thought that maybe this year mum wanted another cake or not at all...
She has her times when she'll just devour cake and there are times when she won't even look at one.

So another Black Forest it was and not it wasn't a surprise cake affair as we went shopping for the ingredients together! She kept saying "make it nicely" "make it properly" each time she entered the kitchen when I was baking the cake. Talk about pressure ~ but Thank God the cake came out well, in fact very well! Mum loved it so much that she ate quite a lot, more than her usual 'one small piece'.


Next was a Frozen Birthday cake for my lovely beloved niece who turned 5! Oh how time flies and she has definitely grown! The frosting was fresh cream, with a light hint of pink and edible pics of her favourite character of the Disney animation.
Yep, she enjoyed the cake I think but I believe she enjoyed eating Elsa and Anna more!!


 Ben 10 was almost similar but I used green instead and M & M for deco to go with the edible hero.
Like I said, I wished I had more time and would have decorated the cake much more.


All three cakes were chocolate sponges.
Recipe as below:

Chocolate Sponge
source : I can't remember

Ingredients
5 eggs (I reduced it to 4 as I used Gred A eggs)
170g castor sugar
1 tsp heap ovalette
100g Super Fine Flour (All purpose also can but SFF is better)
1 tsp (heap) baking powder
40g / 1 1/2 Tbsp Cocoa powder
70g oil (corn or any vegetable oil also can)

Method
In a bowl using hand mixer beat eggs, sugar and ovalette until light and fluffy.
Gradually add in the flour and cocoa powder, (I did three times) and continue beating at low speed.
When just combined, drizzle in the oil, beating briefly only.
Next, using a large spatula slowly fold the mixture and carefully not to knock out the air.

Pour the batter into prepared greased and lined cake tins. For the Black Forest I used 3, 22 cm cake tins to get three layers. For the Frozen and Ben 10 I only used 2.

Bake at 160 for 15 min. or until cook. Careful not to over cook the sponges or you'll have a very dry cake.


Happy Baking.

Wednesday, 6 May 2015

Doughnuts

Yes, doughnuts again!
Actually it was for my Mum, who had a craving for the sweet tea time treat.
I guess it was from watching too much Donut Showndown on Diva!

The recipe we tried before this didn't turn out to well and had too many steps.
I hate long winding recipes, so I browse the internet until I came across one that suited my
laziness!

The recipe had egg, I just only found out that! All this while the recipes I had tried and tested for doughnuts had no eggs! Tak palah, only one egg, so okaylah tu.
The best part no need for special flour, plain old tepung gandum is used.
But maybe next time I'll add a bit of vanilla essence...

So are you up for it? The original recipe required the dough to be made into small balls, and later stuffed with jam but I just cut it out with a doughnut cutter and got much more than 12.
The sugar part is a bit confusing at first but basically all the recipe needs from the stated 4 Tbsp is
1 Tbsp and 1/2 tsp only. The rest was used to roll the freshly cooked doughnuts.


Doughnuts
source: BBC Good Food

Ingredients
1 Tbsp dried yeast (I tipped the entire sachet)
4 Tbsp castor sugar
150ml warmed milk (1 min on med in the mircowave is good enough)
8 oz /225g plain flour
1/4 tsp salt
50g melted butter (2 Tbsp)
1 beaten egg

Method
In a bowl mix the yeast. 1/2 tsp sugar and 2 Tbsp milk.
Let it stand for 15 minutes or until it becomes foamy.

Sieve the flour and add in 1 Tbsp sugar. Make a well in the center and pour in the
yeast mixture, melted butter, rest of the milk and the egg. Mix well, you might need
a bit of flour is the dough is sticky. Knead the dough until it smooth.
Let the dough stand, covered in a warm place for 45 minutes or until double in size.

Knead again for about 5 minutes, roll the dough into small balls or use a doughnut cutter.
Place the doughnuts onto a tray and let it stand for another 30 minutes or until dough has double it size.

Heat up the oil in a frying pan or kuali or wok. Gently lift the doughnuts from the tray and drop them into the oil. Fry until golden brown. Toss the excess oil and roll the cooked doughnuts in the rest of the sugar.
All done! Makanlah!
The original recipe, after the balls has cooked, make a small slit at the side and pipe in jam.
I think rolling in sugar is easy and yummy.

Do try it, as it is worth the long wait. It helps if you are doing something else...
But don't leave the dough out too long as it will dry up.

Good Luck!

Cream Puffs


Cream Puffs, or choux pastry not to be confused with the other cream puff recipe I uploaded.
The Japanese Crispy Cream Puff has an extra piping of butter cream before baking.
So there is a crispy layer or skin on the puffs when cooked.
Where else this one is soft and smooth with a fine dusting of icing sugar.

In the original recipe the puffs are dipped in melted chocolate and has orange chocolate filling.
I followed the recipe for the choux pastry. And the method is my take after several tries and errors!

Cream Puffs
source: The Australian Women Weekly Cookbooks (Chocolate Cookbook)

Choux Pastry
75g butter, chopped
1 cup water
1 cup plain flour
4 cold eggs

In a pot combine water and chopped butter. It is advisable for the butter to be of room temperature and chopped into small cubes so that it melts faster.
Once the butter is all melted, turn down the heat and add in all of the flour.
Using a wooden spoon stir vigorously until combine and the dough pulls away from the sides of the pot and forms a ball.
Turn of the heat and allow the dough to cool.
At this point some recipes say to continue beating with a hand mixer or transfer the dough to another bowl.
I just let it cool in the pot, stirring occasionally for it to cool. It takes about 20 minutes or so.
I read that real cold eggs will also help cool down the dough that's why I said cold eggs.

Don't make the mistake I made several times of adding eggs when the dough is still very warm.
You will end up with a mixture that is running and will not puff up at all.

Once the dough is reasonable cool, add the eggs one at a time and continue beating.
I use a wooden spoon but you could use a hand mixer.
Keep adding the eggs and beating until the mixture is smooth and glossy.

You can either pipe the mixture onto a greased oven tray or use tea spoon to drop the mixture onto the tray. I personally found the tea spoon way faster and easier.

Bake for 10 min on high heat and later the next 15 min lower the temperature.
Once it puffs up and is golden brown, take out and cool on cooling rack.

Once cooled, split the puff with a knife or scissors. Pipe in the custard into the puffs.
Lastly dust some icing sugar on the top.

Happy Baking.


Thursday, 12 March 2015

Granola oh granola

Granola, hmm... I had them before.
I liked them but they were too expensive.
I switched to cereals and oats. But oats, as porridge after a while feels yucky and tasteless even with all the delicious toppings.

In fact I haven't had any for a long time, I often looked for the dried fruits under all that oats.
Then just the other night, I was watching a cooking programme on AFC, Urban Cook. An Indonesian cooking show actually and was fascinated by the way the show was done, quite different from our boring ones with a nosy, bored, uninterested 'host' and a over hyper chef...

What got my attention the most was how easy granola was prepared. Btw in that episode, he made granola bars, I didn't fancy egg whites in my granola even if it was baked...

So I surfed the net and searched for various recipes for granola.
I found some that were interesting but some didn't quite suited my taste buds or had too many steps.
Lastly I opted for an easy on on BBC Good Food.

I must say that I made it in the middle of the night, with ingredients that were in the fridge! So I left out a few things... but it was received very well by the masses and my next batch I'll try to stay true to the recipe.
As for the brown sugar bit, leave it out if you want. I just wanted the lovely taste and smell of caramel on the granola.
Since my mum loves raisins, I added a little bit more of dried fruits than required.

Here is the recipe, if you are interested. Like I said, I made some subtle changes, I believe that it should be suited to our individual taste and wallets.


Crunchy Granola with Berries and Cherries
source: BBC Good Food.

Ingredients
175g mixed nuts (I only had walnuts at that time)
450g oats (they didn't say rolled or instant but I used the instant one)
50g sesame seed
50g sunflower seed
100ml runny honey (I just scooped out the one in the small plastic bucket)
125ml sunflower oil (Any vegetable one will do)
80g dried berries and cherries (I used dried cranberries, raisins and apricots)
1 tsp salt (optional)
2 Tbsp brown sugar (I added this)

Method
Set the oven at 180C
Roughly chop all nuts and berries into at least bite size pieces.
In a bowl, combine all the oats, nuts, seeds and oats.
Pour in the honey and oil into the bowl of dry ingredients and mix well.
Tip the contents onto a baking tray and gently pat to even the mixture.
This is so it cooks evenly.
Lastly sprinkle the brown sugar over the oat mixture.

Bake for 25 to 30 min, until golden brown.
Keep stirring it, at least twice at intervals.
Keep checking because the oats burn easily.

Once golden brown, take out of the oven and cool.
When cooled, toss in the dried fruits or berries and mix well with the granola.
Now it is ready and can be stored in an air tight container.

Eat with milk, yogurt even ice cream is good or just on its own.
Drink lots of water.

Happy Baking.

Wednesday, 11 February 2015

Marble Cake - Again!

A friend's birthday was last week, but didn't have time to make a cake on that special day.
So instead I made one a belated one.
I baked marble cake, and used butter cream for the topping.


Marble Butter Cake
source: QL Kitchen

Ingredient
225g butter
225g sugar
225g self raising flour
4 eggs
6 Tbsp milk
2 Tbsp cocoa powder
1 tsp vanilla

Method
Cream butter and sugar until fluffy.
Add in vanilla and the eggs one at a time, beat well.
Alternate 3 Tbsp milk and flour into the mixture.
Divide the batter into 2.
Leave one plain while the other add the cocoa powder and 3 Tbsp of milk.
Mix well to combine.

In a lined and greased cake tin or loaf pan, spoon in the mixture accordingly,
you can either put four small dollop of batter in the tin or
layer it, two spoon full of each batter at a time.
Either way the cake looks good.
Use a bamboo skewer and zig zag a pattern before baking.
Bake at 180 C for 1 hour.

Once cake is cool, you can either leave it as it is or spread the icing.

Butter cream icing.

Ingredients
125g butter
70g shortening
80g icing sugar
2 Tbsp of condensed milk
1 tsp vanilla.
 Food colouring.


In a clean bowl, cream the butter and shortening until turns light and fluffy.
Add the vanilla.
In two batches, add the icing sugar into the butter mixture.
Once well mix, add the remaining icing sugar, continue beating,
The mixture is smooth and spreadable.

Spread onto cake and decorate as you like.
Happy Baking.


Wednesday, 4 February 2015

Aglio Olio

Aglio Olio with seafood

Pasta...mmm either you love it or hate it.
To some pasta is only spaghetti bolognaise, but truthfully there is huge variety of it and sadly
not all are available here in our currently windy and sunny Malaysia.
Oh the winds, let me take a break from talking about pasta.
I lobe it! I really do. Clothes dry like super, super fast. I love the feeling of it gushing about, blowing already messy hair all over the place LOL Curtains flying, doors slamming - involuntarily of course!
But on the down side, dry leaves and rubbish like snack or sweet wrappers fly into the house from the road side, not to mention the sand and small pebbles.
More house work, more cleaning to be done *sigh* Just one of those things that has to be done.

Let's focus on more happier and yummier things like this Aglio Olio with seafood.


Aglio Olio means, garlic and olive oil, and in the true sense that is what it is, warm pasta tossed with garlic fried in olive oil, just sprinkle some freshly chopped parsley and eat.

But pasta lovers will beg to differ and say that there are a several versions and one of the popular one is with sea food. You can also substitute it with chicken, I've even seen on restaurant menus, fillets of fish!
All in all it is up to your taste buds and preference.
Here I used prawns and squids, but clams can also be added.

I just wanted to share with you my version of Aglio Olio with Seafood - spicy version!

Aglio Olio with Seafood.

Ingredients
1 packet of spaghetti (500g)
Boil for about 8-10 min, toss and set aside.
The water must be boiling before you put in the pasta.
Ensure there is enough water or the pasta would stick to each other.
The pasta doesn't needs to be cooked long because it is going to be cooked again later.
So, al dente is okay.

olive oil
5-6 cloves of garlic
5-10 cili api /bird's eye chili (add or lessen depending on your tolerance for chili)
250g fresh prawns
250g fresh squid
1/2 tsp of dried mixed herbs (optional)
freshly chopped parsley
1 Tbsp dried chili flakes
salt and pepper to taste.

Method
In a food processor minced the chili and garlic or just smash them in a pestle and mortar.
In a wok pour in about 5Tbsp of Olive Oil and over med heat fry the garlic and chili until fragrant.
Careful, the garlic burns easily.
Add in the seafood or chicken, stir fry until cook. The prawns turn pink, the squid and chicken white.
Season to taste before taking them out and set aside.

This is to prevent the seafood from over cooking and becoming tough.

Add in the spaghetti and mix to combine with the chili and garlic mixture.
At this point, you can add salt and pepper.
Stir gently as not to break the pasta, add the mixed herbs if using and dried chili flakes.
Add the cooked seafood and cook the pasta until warm through.
It depends if the pasta is a bit dry add some water.

Lastly, drizzle some olive oil and sprinkle the parsley over the pasta before plating up!

Best eaten warm but cold is good too. Just pop into the mircowave for a few minutes to warm it up for later!


Chocolate Chip Cookies

Chocolate Chip Cookies

Like anyone else who love chocolate that is, I can never resist a chocolate chip cookie.
I love them, with nuts, without nuts, with oats and even the double chocolate ones.
I think I've baked hundreds of these chocolatey nuggets but never tried the what I call white ones.
White because the biscuit is light in colour and the chips can be seen.
The recipe that we have is double chocolate, so the mixture is dark due to cocoa powder and lots of chocolate chips. The white bits would be the nuts. It is kinda hard to tell when it is ready and more than once I burnt these delectable cookies due to my carelessness!!


As always I was browsing blogs and sites looking for something else when I stumbled across a recipe on BBC Good Food. It was called Vintage Chocolate Chip cookie, now with a name like that who wouldn't want to take a peek at what it is about.

I read through the recipe and found it easy enough, I had almost all the ingredients. I didn't have any chips so I chopped away at a block of cooking chocolate instead, the result as you can tell from the dark patches on the cookie was very satisfying. I intend to just use chunks the next time too.
The masses enjoyed these very much and I have a feeling I will be making them several more times.

The recipe doesn't call for any nuts, although they did say you could add some. I added about 1/2 a cup of chopped walnuts to the mixture. I divided the dough into two, leaving one as it is and the other I added 1/4 cup of oats. The masses couldn't decide which was better but loved both versions.

No heavy machinery required, a wooden spoon is sufficient. Use a hand stand if you like.
This batter is rather wet, so I suggest if you don't want to get your hands dirty use a  ice cream scoop or two spoons. I just used my fingers and 'agak-agak' the size of each cookie.

The recipe, should you want to try is as follows:

Vintage Chocolate Chip Cookies
source: BBC Good Food

Ingredients
150g butter
80g castor sugar (I only added 50g)
80g brown sugar
2 tsp vanilla
1 egg
225g all purpose flour
1/2 tsp bicarbonate of soda
1/4 tsp salt (I didn't)
200g chocolate chips or chunks

Method
Cream butter and sugar until creamy.
Add the egg and vanilla, beat some more.
Gradually add the flour and mix well.
Lastly fold in the chocolate chips or chunks and if using, the nut/oats.

Drop the cookies, using spoons or ice cream scoop onto a greased oven tray.
It spreads so don't put them so close.
Bake at 180 C for 20 min.

Enjoy the cookies with ice cream or on its own.


Happy Baking!


Friday, 9 January 2015

Blondie

Blondie, a version of brownies that doesn't require cocoa powder or chocolate.


A friend's birthday was coming up and she doesn't like chocolate so much, so I thought why don't I bake her some blondies?
Thankfully she said they were good and enjoyed them!
For a twist, I added caramel chips instead of chocolate chips and place the blondies on paper cups, securing each with a ribbon.

Chocolate Chip Blondies
source : taste of home

Ingredients
11/2 cups of brown sugar (too sweet for me, you might want to adjust to your taste)
1/2 cup melted butter (I used sunflower oil)
2 eggs lightly beaten
1 tsp vanilla
11/2 cup all purpose flour
1/2 tsp salt
1/2 tsp baking powder
1 cup chocolate chips (I added caramel chips and a sprinkling of dark chocolate chips)

Method
Combine sugar, butter, eggs and vanilla, mix well.
Combine flour, baking powder & salt and add to mixture.
Stir in the chips.

Spread batter in  13" x 9 " greased tray. Bake for 20 minutes at 180 C.

When cooked, take out and cool before cutting into squares.
I got 40 squares out of this recipes. Delicious warm or cold. Taste even better the next day!

Happy Baking.


Chocolate Fridge Squares

I love eating this and always wanted to have a recipe that I really liked and easy to make.
Throughout the years I came across several, some were good but always there was something wrong like too sweet, or too much of an ingredient that I don't like or the entire recipe cost too much, not really worth the time and effort.
Surprisingly I found one in a children's cook book.
It's not ours, but a friends'- thank you very much Suzila for lending us the books!

I copied it down in such a rush that I forgot to take down the name of the book, author or even the real recipe's. I vaguely remember it as chocolate fridge something.


Some recipes use cocoa powder, milo, or marie biscuits but this one, uses digestive biscuits and
chocolate...melted choclate and golden syrup! YUMS!!
But you can use Marie Biscuits too, the chocolate or coffee ones are equally delicious.
So if you want, try out the recipe and believe me it is worth the while.

Chocolate Fridge Squares
source: Suzila's Children cook book.

Ingredients
200g chocolate (I used dark chocolate buttons)
100g butter
4 Tbsp Golden Syrup
225g (8 oz) Digestive Biscuits (I used the entire packet save one of the short Mc Vite's Digestive)
125g pistaschio (I used walnuts)
200g chopped dried apricots (I used dried cranberries)

Method
In a bowl over simmering water melt chocolate (if not using buttons or chips, chop the chocolate to smaller bits so that it melts quicker and easier), butter and golden syrup.
When the chocolate mixture is evenly melted take off fire.
Add the broken biscuits to the melted chocolate mixture and mix well.
Pour the mixture into a greased tin, I just lined a plastic wrap to cover the sides and bottom of the 
cake tin for easier lifting and less greasy.
Spread the mixture evenly and pop into the fridge for at least 2 hours.
Once hardened, take out and cut into squares!


Happy Baking.


Thursday, 18 December 2014

Carrot Cake

Easy Carrot Cake.

Maybe I should change that title to the easier carrot cake - ever!

Honestly I do not like carrot cake.
But it appeals to some. My mum has been telling me to bake one like for quite a while,
but since I'm not a fan I took my time searching the internet and recipes books for a good one.
Actually I was really looking for an easy one that doesn't require much ingredients or steps.
Me being lazy ha ha ha!

I kept 'looking' until one day, mum decided that she really wanted to eat one. So off we went to a famous cake shop, I won't mention it here as I don't want to hurt people's feelings...
Bought a piece, brought it back and well needless to say mum was not pleased! Wasted a good RM 10.00 too!

So I Googled for carrot cake recipe and got several. There were even ones with pineapple!?! Wasn't this suppose to be carrot cake? So then I tried Googling easy carrot cake recipe and magically this recipe appeared!
I have baked this twice and both times it was a big hit! Mum is happy, so I'm 'happily' grating the carrots!

One thing though, at the end of the recipe there is a link to a video on youtube.
You will notice that some of the measurements for the ingredients vary. So I opt for the youtube version.
It is up to you, which one to chose, but I posted the one on youtube.

I chose a rectangular baking tin but you could easily use an 8 in round tin too!


Carrot Cake
source: all recipes uk
watch it on youtube

Ingredients
250g all purpose flour
4 eggs
300ml oil
2 tsp vanilla
2 tsp bicarbonate soda
2 tsp baking powder
1/2 tsp salt
2 tsp ground cinnamon (I skipped this)
400 g sugar (I used brown sugar)
120g chopped walnuts (I only used 100g)
350g grated carrots

Method
In a bowl, combine eggs, oil, sugar and vanilla and beat until creamy and thick.
Add in flour, baking powder, bicarbonate soda and cinnamon (If using).
Beat again.
Add in the grated carrots and walnuts. Mix to combine.
Pour into greased tin and bake at 180 C for 40-50 min.
Leave to cool in tin for 10 minutes before taking out.

Cream Cheese Topping.
125g butter
200g cream cheese
1 tsp vanilla
450g icing sugar
120g walnuts ( I skipped this)

Method
Beat cream cheese and butter until smooth and creamy.
Add in the icing sugar and beat again.
Add in the vanilla and the walnuts.
Ice the cake when it is cooled.

** I did this icing and got a lot. Too much for the cake.
In fact I could ice two cakes with one quantity of topping.
I suggest you half the recipe for a cake.

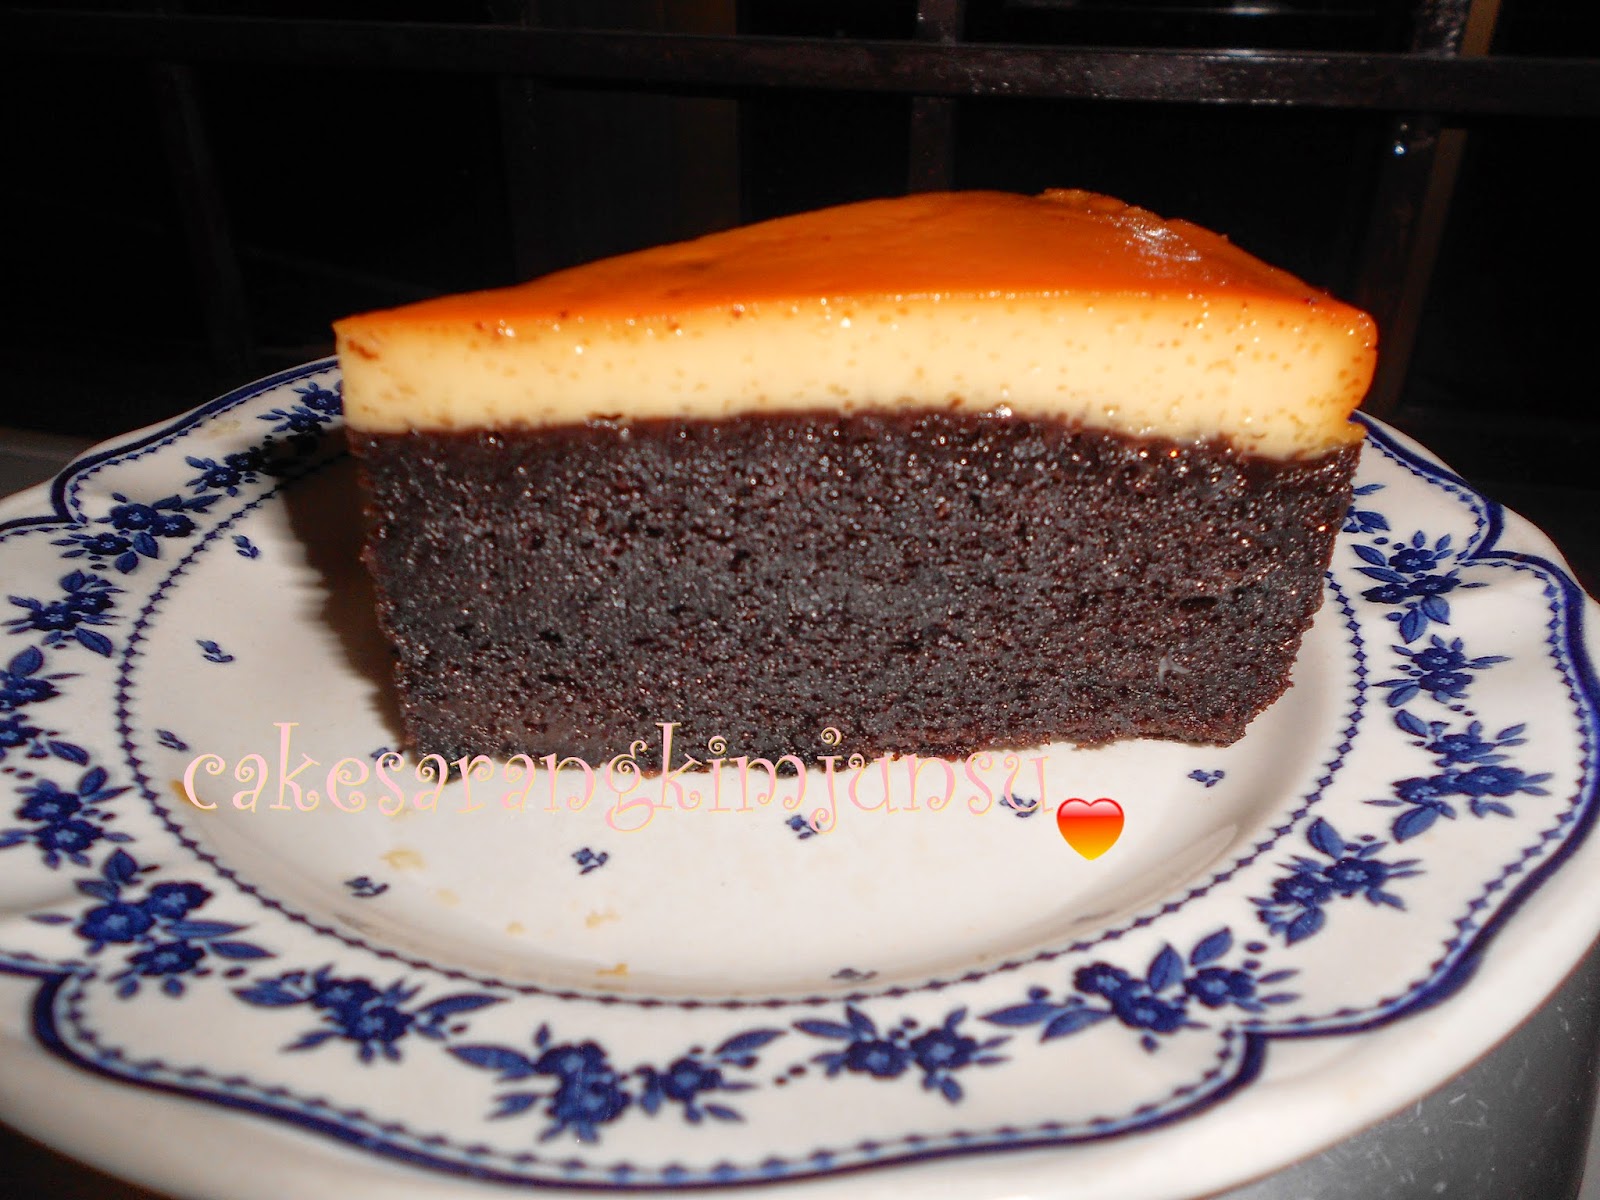
Caramel Chocolate Cake

 Caramel Chocolate Cake


Hmm... the name of the cake alone is already making me drool.

In fact I came across several recipes of this said cake a few times but after reading the ingredients and method I just skipped to the next recipe as I thought it was a tad tedious and hassle.
This is the sure proof that you'll never know until you try.

A few weeks ago, my brother's friend gave us several pieces of this cake.
At first I was rather skeptical, the cake looks great but I wonder does it taste great too?
After all it is a steamed cake and I don't really like steamed cakes.
But after one mouthful, I was totally convinced that I have been an idiot not to try out this recipe sooner!
Make sure your steamer is filled with water at all times and ready!

Caramel Chocolate Cake

Ingredients

2 Tbsp sugar
Sprinkle onto baking tin (8 in round tin) and slowly melt over fire until it turn brownish.
Be careful not to burn the sugar!
Put aside to cool.

For Caramel
1 cup condensed milk
1 cup evaporated milk
3 yolks
1 tsp vanilla

In a bowl combine everything, and whisk to combine.
Don't over beat, as air bubbles will make your caramel filled with holes.
Pour onto cool melted sugar and steam for 15 mins.
Once cook, take out and leave to cool for a while.

For the Chocolate Cake
A
1 cup condensed milk
1 cup evaporated milk
1 cup oil (any cooking oil will do, I used sunflower oil)
1 cup sugar
1 cup cocoa powder

Combine all the ingredients in a pot and slowly cook until it turns into a smooth paste
and warm through. Stir at all times, to avoid burning.Switch off fire and cool.

Chocolate Cake
B
4 eggs (lightly beaten)
1 cup flour
1 tsp bicarbonate soda
1 tsp baking powder

Sieve flour and both baking powder and soda . Beat the eggs.
Using a whisk, alternate the flour and eggs into the chocolate mixture.
Then slowly, using a ladle, spoon the mixture on top of the caramel layer.
Do it gently to avoid breaking the caramel.

Then steam again for 45 min to 1 hour.
Check that there is water in the steamer at all times and occasionally wipe the insides of the cover to avoid too much water dripping onto the surface of the cake.

Leave the cake to cool completely, about 2 to 3 hours before attempting to remove it from the tin.
Using a butter knife gently loosen the sides and use a plate to flip the cake as some melted sugar will drip to the sides of the cake.
Cool in the fridge or eat it.

Happy Baking.


Crispy Japanese Cream Puff


I came across this recipe while looking for another recipe. In fact it didn't have anything to do with cream puffs at all!
I often wondered what those cracky bits on top were whenever I spot theses at the shops. Lo Behold, I now know! LOL

Basically, cream puffs are choux pastry.
  1. Choux pastry, or pâte à choux, is a light pastry dough used to make profiteroles, croquembouches, éclairs, French crullers, beignets, St. Honoré cake, and gougères. It contains only butter, water, flour, and eggs. Wikipedia
Choux pastry is not easy to do. I had several moments where I just wanted to throw everything in the bin or they, i.e the puffs simply refuse to puff up! Believe me, I had my fair share of ruined profiteroles which we commonly call cream puffs.

I have yet to try making eclairs, although it just a different technique in pipping the shape of the pastry
but I do want but am afraid to try out croquembouches!

Look how beautiful they are, a real treat for a very special occasion like a wedding, birthdays or even Christmas!
They are just stacked puffs, 'glued' around a cone, to retain its shape and filled with whatever your heart or tummy desire, cream, custard or chocolate. Then drizzled if wished with melted chocolate, or draped with pulled sugar or just left on its own.
But it requires a lot of patience and hard work, something I am lacking in... hihihi!
Pictures courtesy of Google, unfortunately not mine T T


Right back to reality, 'knock, knock' on my head.
The recipe for this cream puff version, a Japanese one is relatively easy to follow.
I must admit it is the first one I have come across that has baking powder as one of its ingredients!
But I tried it out, in fact several times and it worked! Hey, go figure janji it comes out fine and delicious!
I think the tricky part would only be where you cook the dough on the stove.

Make sure, the fire is medium low and that the dough must pull away from the sides of the pot and forms a ball. If this doesn't happen, *sigh* don't waste your time, energy and electricity to go to the next step.
In choux pastry the dough forming into a ball is a very important step.
Using cold eggs also helps cool the dough.
Another tip, a hot oven is also vital as it helps the puffs, to puff up!

But with a lot of practice and patient, it is possible.
Please don't let my words deter you from trying out this wonderful pastry.
Follow each step carefully and take care during the cooking process, God's will you will be fine.

If you are up to it, here is the recipe.

Crispy cream puff
source: Julia Homemade

Ingredients
100g of butter
1 tsp of sugar
110g water
1/2 tsp salt (omit if using salted butter)

120g all purpose flour
1/2 tsp baking powder
3 eggs

Topping
50g butter
50g sugar
1 Tbsp water (I added another table spoon of water for smoother flow)
50g flour

Beat all into a smooth paste.
Put it into a pipping bag and pipe spiral circles, onto the puffs.
* make sure to cover the puff evenly as it will expand as it cooks.

Method
Preheat oven to 180-200 C.
In a pot, combine water, sugar and butter. Boil gently until the butter melts.
Add in the flour all at once and stir until the flour combines with the mixture.
Keep stirring until the dough pulls away from the sides of the pot and forms into a ball.
Switch off the fire.
Put aside to cool.
When cool, add cold eggs one at a time. Use a wooden spoon to beat until combine before adding another egg. Lastly add in the baking powder. Beat again to combine.

Now either using a piping bag or a spoon, pipe or place the balls of pastry onto a greased baking tray.
Leave some space in between each puff as it will balloon up twice its size.
Pipe the topping on each puff.
Bake at 180-200c according to your oven, until puffy and golden brown.

Take it out of the oven and cool on a cooling rack. Be gentle, as a hot puff can suddenly deflate if crushed.

The Filling
Puan Julia used chocolate cream as the filling, but I prefer a custard filling.

3/4 cup of milk
2 Tbsp custard powder
2 Tbsp sugar
1/4 cup water

Mix the custard powder with the water, stirring out the lumps before adding it to the milk and sugar mixture.
In a pot, gently boil everything, stirring occasionally to avoid lumps.
Once the custard thickens, and warm through switch off fire.

Cut the puff using a scissors, half way through and pipe in or spoon in the warm custard.
Ready to eat!

Happy baking.


Tuesday, 14 October 2014

Doraemon!

Birthday Cake

A friend asked if I could bake a birthday cake for her son's first birthday... cute! First birthdays are important even if the birthday person isn't quite aware of what exactly is happening or who are all those people...!!

The mum wanted it to be Doraemon as that is his favourite cartoon character.
So off I went looking high and low of the said cat's edible icing sheet, but sadly after visiting 4 shops, Doraemon was no where in sight!
Eventually we settled for figurines of the blue cat made of sugar and some plastic toys.

For this cake I baked a Victoria Sandwich, chocolate and vanilla with butter cream topping.
As she didn't want a lot of cream, I covered the sides lightly with some butter cream before propping up bars of Kitkat that look like fences. For a festive touch I added some colourful lollipops.

Applying the fences a.k.a kitkat takes a lot of patience and a bit of icing.
Patience, so that the bars don't break as you are unwrapping them.
Icing, works like glue to stick to the cake. When done, gently press the bars to the cake and put it in the fridge to set. Same goes for the cats, a bit of icing at the bottom of eat figurines, helps them stick better.
I piped some rosette at the edge between the cake and kitkat bars, to close some gaps.
If you like, tie a colourful ribbon around the chocolate bars with a big bow right at the front.

Here is the end product, I left the front part empty for the candles.


Victoria Sandwich
source: my mum's recipe book

4 oz self raising flour (I used Blue Key)
1 tsp baking powder
3 oz castor sugar
2 medium size eggs
4 oz butter
* I doubled the recipe for this birthday cake.

Method:
Cream butter and sugar until fluffy.
Add in eggs one at a time, beat well.
Fold in flour in batches and mix well until batter is smooth.
**
Line and grease 2 baking tins.
Bake for about 25-30 min at 180 C.

Take cakes out of tins and cool on racks.
When cakes are still warm, spread jam on the surface of one cake (pick the bottom part of the cake, as it is easier to spread the jam) before topping it with the other cake.

** If you are doing the chocolate part, put aside half of the batter and add 1 Tbsp of cocoa. Mix well until all the batter is evenly mix, just use a wooden spoon or spatula. Pour batter into tin and bake.

For the butter cream
125g butter
70g shortening
80g icing sugar (please sift first)
1 tsp vanilla
1 Tbsp condensed milk

In a bowl beat butter and shortening until light and fluffy,
then add the vanilla. Beat again.
Gradually add the icing sugar and continue beating until all the
sugar is finished. Lastly add in the condensed milk.
Mix well and it is ready to be used.

For colour, just add a few drops of your favorite colour. 

Happy Baking!


Monday, 22 September 2014

Marble Cake - another recipe


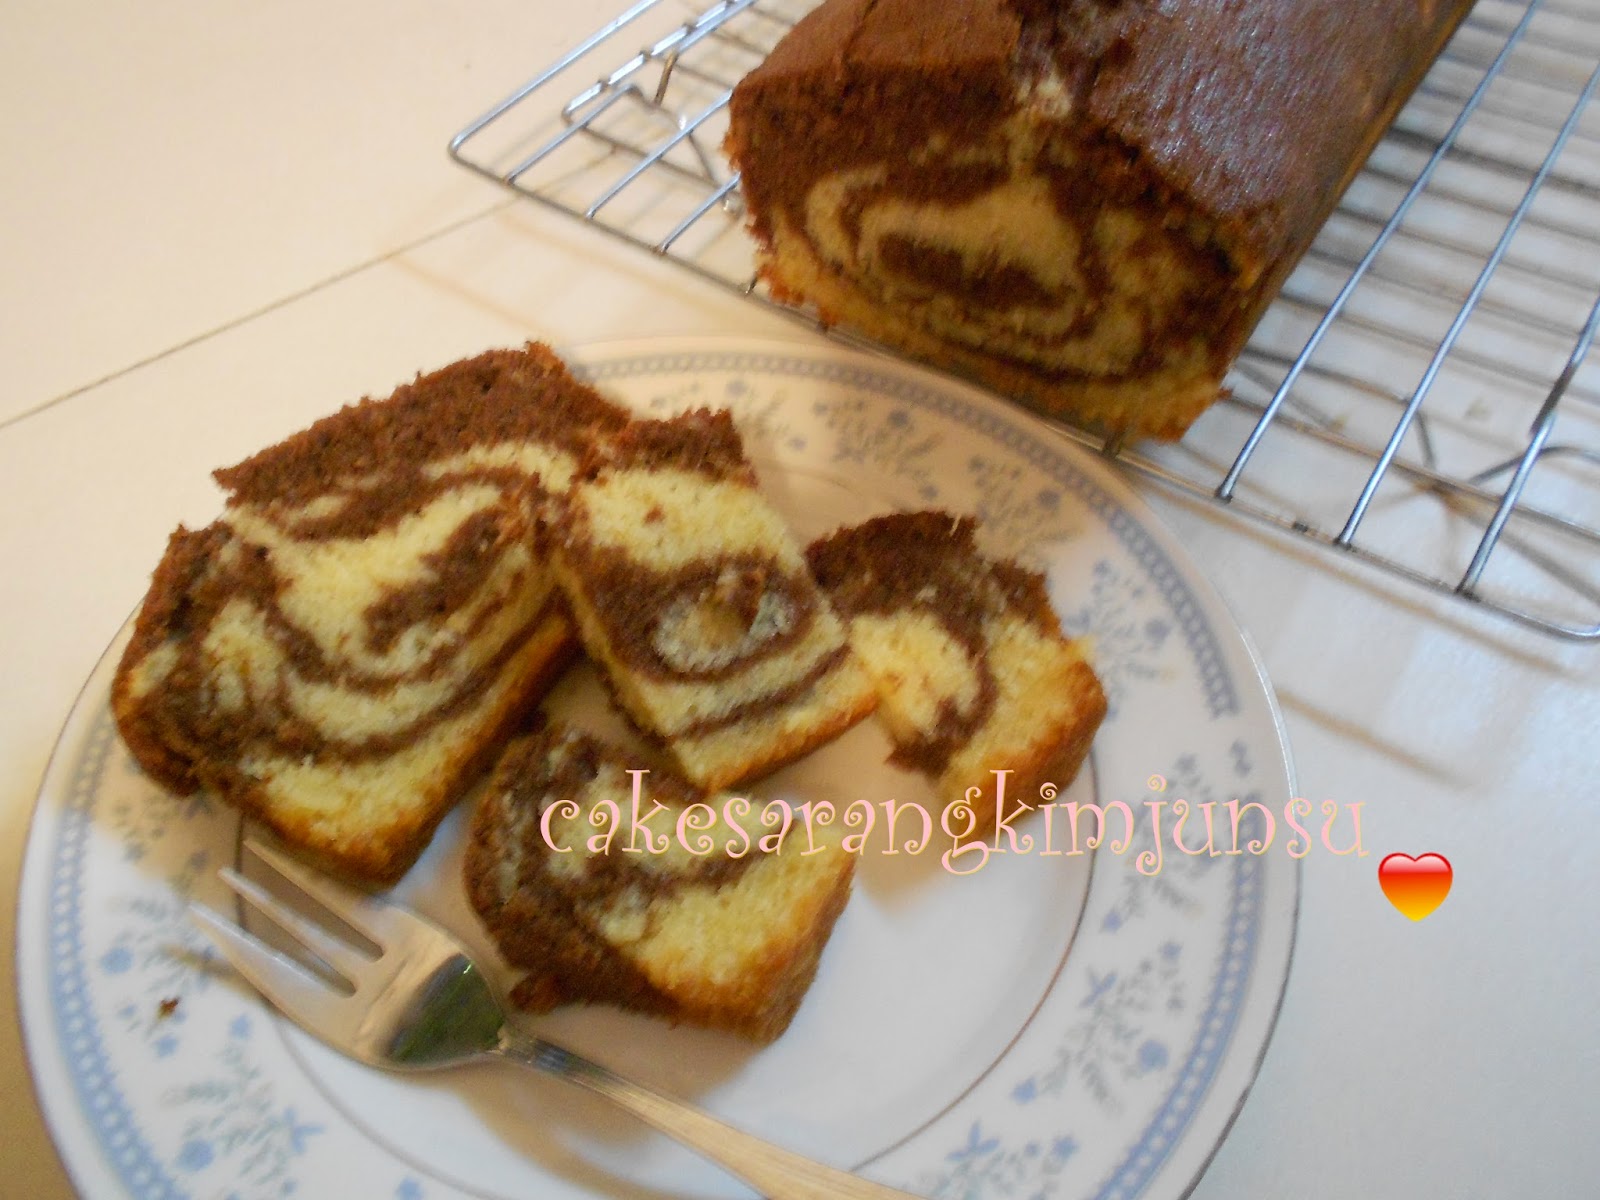
Just look at that, sedapkan?
YES! It is!
Forgive my rudeness, but you ought to give this recipe a try.
It is just perfect for lazy me. The steps and ingredients are basically easy.
Okay let's back track for a bit.
As always, me and almost everyone out there love browsing through the internet, other then their
prefixed favorite pages.
I'm no different, but I do love roaming and reading cooking blogs especially ones with recipes and good pictures. Ahem, the pictures do help!
Sometimes, it is irritating when I scroll down only to discover only pictures and no recipe *sigh* but I guess some people don't want to share or just love posting pics.

I came across this wonderful site. Not sure how I missed it before but it has some very interesting recipes.
I like the layout, very user friendly and the instructions are easy to follow. To find out more, click here -
 QL Kitchen

I'm sharing their Marble Cake recipe. Try it, it is worth the time and effort.
I used a wooden spoon to beat up the butter and sugar, too lazy to take out the hand mixer.
I also added 1 tsp of Baking Powder to the flour.
I used 1 non stick loaf pan. 30cm x 11 cm, 6cm deep. I still greased and lined it with paper anyway.

The cake is light, not too sweet or greasy. The masses ate almost half! I was lucky to snap the photos before it disappeared!
Well QL Kitchen, thank you so much! I'm sharing this wonderful recipe with everyone else. This recipe is definitely a keeper!!


Marble Cake
source: QL Kitchen

Ingredients

225g butter
225g castor sugar
225g all purpose flour (to this I added 1 tsp baking powder)
4 eggs
6 Tbsp milk (I used evaporated milk)
2 heaped Tbsp cocoa (I only used 1 1/2 Tbsp)
1 tsp vanilla

Method
Cream butter and sugar. Add eggs one at a time.
Add in vanilla essence. Mix well.
Alternate the flour and 3 Tbsp milk, mix well.
Divide the batter into 2 bowls.
Leave one plain and to the other half add cocoa powder and 3 Tbsp milk.
Combine well.
Use 2 clean spoons to alternate the batter into the cake tin.
Lastly use a skewer to make marble like patterns on the top.

Bake at 180C for 45 mins - 1 hour. It depends on how many cake tins you use.
I used 1, but QL used 2 smaller ones, so the cooking times is faster.
Allow to cool before tipping it out of the cake tin and on to a cooling rack.


Happy Baking.

Wednesday, 17 September 2014

Scones


Scones


Scones... Mmm I love the buttery smell of scones. It is delicious even on its own. Opps I sound like a roti add on tv! Straight from the oven, warm or cold I love them.
But seriously scones, a tad tedious to do as it requires the least bit of handling or you'll end up with a lump of rock instead of scrumptious scones.

I used a fluted biscuit cutter, sometimes I just use one of the biskut raya cutter in the shape of a circle.
Some scones aren't round but triangle or look like slices of cake. Instead of using a cutter, the round dough is divided into 6 or 8 depending on your preference.
You decide which shape or size you want your scones to be, after all you as the baker has the last say!
As to glazing the tops with eggs makes it look more brown and golden compared to just milk. I brushed mine with milk. Some recipes say you can add dried fruits some don't. I just added a handful about 50g or so into the flour. If you like yours plain, omit the fruits.

I tried two recipes, one with egg and the other without. After tasting both I decided they both tasted almost the same. So here are the recipes if you want to give it a try.


Scones
source: BBC Food recipes

225g/8 oz self raising flour
55g/2 oz butter
25g/1 oz castor sugar (about 1 Tbsp)
150 ml milk
(to glaze: 1 egg - optional. Brushing the tops with milk is fine)
(50g dried fruit - I added raisins, it is optional)


Method
In a bowl rub the butter into the flour until mixture resembles bread crumbs.
Stir in the sugar and the dried fruit if using.
Then add the milk until you get a soft sticky dough.
*I added a bit more milk to mine as it was dry.
Turn on to a floured work surface and knead lightly.
Gently pat out a round about 3cm thick.
Using a biscuit cutter, cut out the scones. Just press down
onto the dough and push out with your fingers lightly.
Arrange scones onto a greased oven tray.
Brush top with egg or milk.
Bake for 15 - 20 min at 180 - 200 C, depending on your oven.
Cool on a wire rack. Serve with your favorite jam or whipped cream.


Mary's Tea Time Scones
source: BBC Food Recipes & Mary Berry

250g/9 oz self raising flour
1 tsp baking powder
40g/1 1/2 oz butter
25g/1 oz castor sugar
1 egg
about 100 ml milk

Method
Put the flour and baking powder into a bowl.
Add in the butter and rub it in the flour until the mixture resembles bread crumbs.
Stir in sugar.
Beat the egg in a measuring jug and pour enough milk until 100ml.
*For this I also added a few tablespoonful more of milk as my dough was dry
Set aside 1 Tbsp for glazing the scones later.
Turn the  mixture out onto a floured surface and pat a round about 2 cm thick,
Use a biscuit cutter to cut out the scones.

Place the scones on a greased oven tray and brush the tops with the leftover milk/egg mixture.
Bake the scones for 10 min at 190-200 C.

Cool on a wire rack and serve with jam or whipped cream.


Happy Baking.

Wednesday, 13 August 2014

Red Velvet Cake

Haven't been updating this blog for a while now.
Most common and popular excuse would be busy! Busylah LOL doing other stuff.
Recently I haven't baked anything, in fact I have been doing a lot of reading.
Sad to say nothing very intellectual but just fiction (like the Beast song) detective stories.
I love them and I think for the past weeks I have bought more books than I ever did in the past year!

Entahlah, there were loads of interesting titles simply calling out to me, you could say I could set up a mini library....
I did give up some books a month back, for a good cause tau! I mean I have reread it several times over and time to share with others. But after my numerous trips to the book shop my book shelf dah penuh balik!!

Today I did bake, had an order for 2 red velvet cakes.
Not only has it been a while since I baked but it has also been a long while since I baked red velvet, cupcakes or cake.
But thankfully I managed to finish both.
This moist and yummy recipe is from Puan Azlita. She has several version of this decadent cake but I chose the easiest one! Have a try, it is worth it.
For today's cake I didn't do her cream cheese topping, instead I opted to iced mine with butter cream instead.
Kak Ita used, two 8' tins, but I used 3.


Red Velvet Cake
source: Puan Azlita Aziz Masam Manis

360g all purpose flour
1 tsp baking soda
1 tsp bicarbonate soda
1 tsp salt
2 Tbsp cocoa powder
400g castor sugar
1 cup oil (I used sunflower oil)
2 eggs
1 cup buttermilk (1 Tbsp vinegar + 1 cup milk, allow to sit for about 5 min before using)
2 tsp vanilla
1 tsp vinegar
1 Tbsp red food coloring (this depends on the type you are using)
1/2 cup hot water (optional - you can add 1 tsp coffee to this)

Method
Sieve the flour, sodas and cocoa powder - put aside.
In a bowl mix the oil and sugar.
Then add eggs, buttermilk, vanilla and colouring. Use a spatula or whisk to mix well.
Add the hot coffee and 1 tsp vinegar.
Gradually add the dry ingredients to the liquid.
Pour the batter into prepared tins.
Bake at 180 for 20 min. This depends on your ovens.


Butter cream
125g butter
70g shortening
80g icing sugar
1/2 tsp vanilla or lemon paste

Method
Cream both butter and shortening first until fluffy.
Add the vanilla and half of the sugar. Beat again.
Add the remaining sugar when icing is creamy.
Beat again.
* If the icing is too stiff to spread add 1 or 2 tsp milk.
Spread onto cake and decorate as you like.

Happy Baking.


Sunday, 27 July 2014

Moist Chocolate Cake

Out of the blue suddenly mum wanted a chocolate cake for Raya.
So I whipped this up in a jiffy, as you can see the result is not so good but the taste it!
That is important! LOL
This time I chose an rectangular cake tin instead of the usual round one.
As it is easier to cut to smaller pieces, lagi pun most people just want "A small piece"!!

Want to try the recipe? 
The recipe for this is here


For the icing I opted for a different one, as I didn't have any cream at home.

Icing

Ingredients
4 oz of icing sugar (sieved)
1 1/2 oz  butter (at room temperature)
1 1/2 oz cocoa (sieved)
enough milk

Method
In a bowl combine all ingredients except for milk.
Mix well to form a paste, then slowly add the milk until the icing is smooth and spreadable.
Once the cake is cooled, cover the cake with the icing and decorate as you like.

Happy Baking.

Thursday, 24 July 2014

Apam Karamel or Apam Gula Hangus

I actually made this yesterday but didn't have time to get it down. It was on the spur of the moment kind of thing.
It was quite late and Mum wanted to eat apam. She loves all sort of apam and enjoys trying out various recipes of it. At one time, she made so many that we all had a hard time eating all the apam.
So back to the recipe, this time Mum wanted a gula hangus apam.
I checked the usually blogs and found an straight foward one by Mat Gebu.

The recipe is easy to follow and tastes very good too. Trylah, you might not like apam but let me tell you this apam is not like the usual beras ones, in fact it is almost like a sponge cake. Best eaten on the day it is made and better still with freshly grated coconut with a pinch of salt!!

Like all steam cakes, get your steamer and cups ready. It is best even when not mentioned in recipes to steam the cups a while before pouring in the batter. Don't know why, but Mum says so, I just follow.
I used medium sized porcelain cups that were greased lightly. You may also line the cups or what ever mould you are using with paper cups.


Apam Karamel or Apam Gula Hangus
source: Dapur Tanpa Sempadan

A
1 cup sugar
3/4 cup water

B
2 eggs
1/2 cup of oil (I used cooking oil)
2 Tbsp  condensed milk
2 Tbsp butter or margarine
1 tsp bicarbonate of soda
1 1/2 cup of all purpose flour (he added another 1 Tbsp, so did I)
1 tsp vanilla (I added this)

Method
First in a pot, caramelized the sugar over low heat. When the sugar starts to burn and turn amber slowly swirl the contents of the pot. Be careful not to burn the sugar. When almost all the sugar is brown, carefully pour the water. Allow the sugar to all melt before switching off the fire and leave the caramel to cool.

Next in a bowl beat eggs, milk, oil and margarine using a whisk. You may use a blender or hand mixer.
Then slowly pour in the cooled caramel, soda bicarbonate and beat again. Add in the vanilla.
Lastly add the flour in batches while whisking until it is smooth.

Pour the batter into the warm cups and steam for about 10 to 15 mins.
**make sure the water of the steamer is bubbling.
It is cooked when the apam is springing to the touch.

Happy Baking.