Pages

Welcome!

Hi, Salam! We love cakes and simplicity! Cakes don't have to be fancy or rustic to taste nice though there's nothing wrong with that! Wanna cake? Feel like eating cakes? A the end of the week treat for yourself? Just as an excuse to get together with family or friends? Or a lovely surprise for a special someone? Contact us.
There also some recipes featured here, but no, no, we didn't create them. Links to the original sites are provided. If there isn't any, we are very grateful for the links but sorry that it got lost or forgotten.

Monday, 22 September 2014

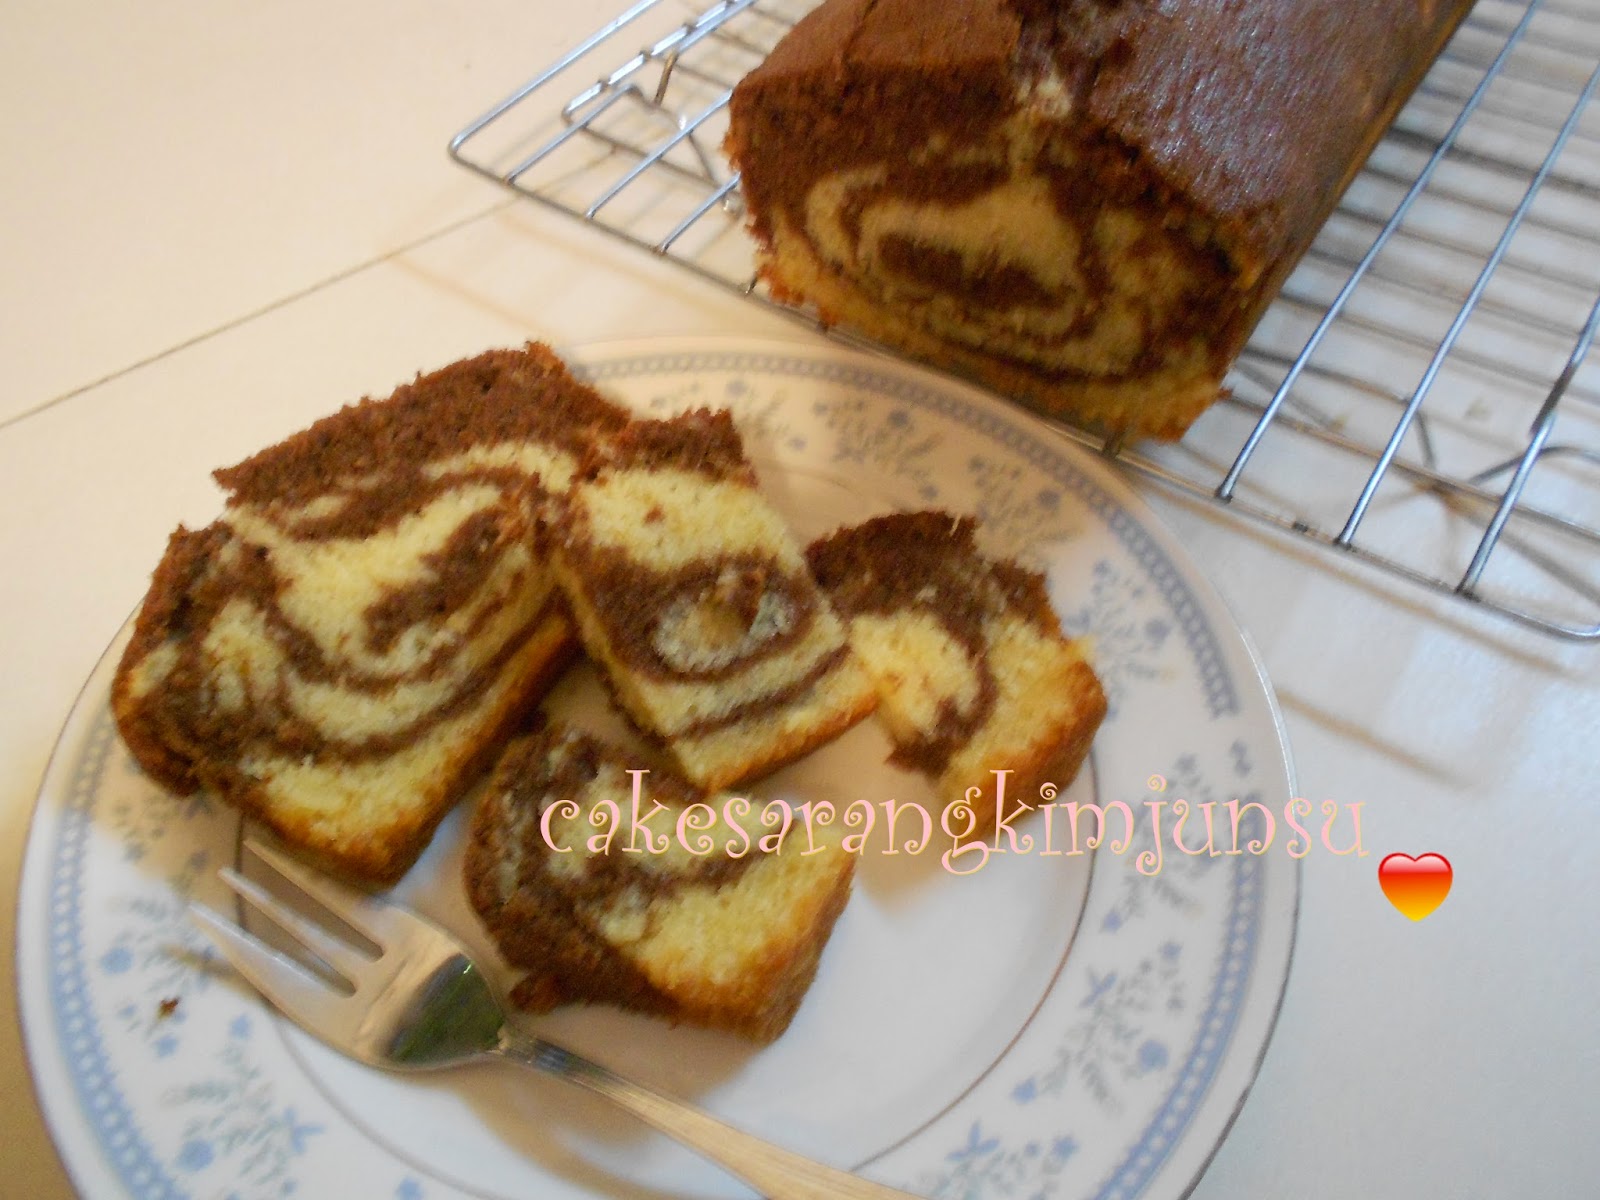
Marble Cake - another recipe


Just look at that, sedapkan?
YES! It is!
Forgive my rudeness, but you ought to give this recipe a try.
It is just perfect for lazy me. The steps and ingredients are basically easy.
Okay let's back track for a bit.
As always, me and almost everyone out there love browsing through the internet, other then their
prefixed favorite pages.
I'm no different, but I do love roaming and reading cooking blogs especially ones with recipes and good pictures. Ahem, the pictures do help!
Sometimes, it is irritating when I scroll down only to discover only pictures and no recipe *sigh* but I guess some people don't want to share or just love posting pics.

I came across this wonderful site. Not sure how I missed it before but it has some very interesting recipes.
I like the layout, very user friendly and the instructions are easy to follow. To find out more, click here -
 QL Kitchen

I'm sharing their Marble Cake recipe. Try it, it is worth the time and effort.
I used a wooden spoon to beat up the butter and sugar, too lazy to take out the hand mixer.
I also added 1 tsp of Baking Powder to the flour.
I used 1 non stick loaf pan. 30cm x 11 cm, 6cm deep. I still greased and lined it with paper anyway.

The cake is light, not too sweet or greasy. The masses ate almost half! I was lucky to snap the photos before it disappeared!
Well QL Kitchen, thank you so much! I'm sharing this wonderful recipe with everyone else. This recipe is definitely a keeper!!


Marble Cake
source: QL Kitchen

Ingredients

225g butter
225g castor sugar
225g all purpose flour (to this I added 1 tsp baking powder)
4 eggs
6 Tbsp milk (I used evaporated milk)
2 heaped Tbsp cocoa (I only used 1 1/2 Tbsp)
1 tsp vanilla

Method
Cream butter and sugar. Add eggs one at a time.
Add in vanilla essence. Mix well.
Alternate the flour and 3 Tbsp milk, mix well.
Divide the batter into 2 bowls.
Leave one plain and to the other half add cocoa powder and 3 Tbsp milk.
Combine well.
Use 2 clean spoons to alternate the batter into the cake tin.
Lastly use a skewer to make marble like patterns on the top.

Bake at 180C for 45 mins - 1 hour. It depends on how many cake tins you use.
I used 1, but QL used 2 smaller ones, so the cooking times is faster.
Allow to cool before tipping it out of the cake tin and on to a cooling rack.


Happy Baking.

Wednesday, 17 September 2014

Scones


Scones


Scones... Mmm I love the buttery smell of scones. It is delicious even on its own. Opps I sound like a roti add on tv! Straight from the oven, warm or cold I love them.
But seriously scones, a tad tedious to do as it requires the least bit of handling or you'll end up with a lump of rock instead of scrumptious scones.

I used a fluted biscuit cutter, sometimes I just use one of the biskut raya cutter in the shape of a circle.
Some scones aren't round but triangle or look like slices of cake. Instead of using a cutter, the round dough is divided into 6 or 8 depending on your preference.
You decide which shape or size you want your scones to be, after all you as the baker has the last say!
As to glazing the tops with eggs makes it look more brown and golden compared to just milk. I brushed mine with milk. Some recipes say you can add dried fruits some don't. I just added a handful about 50g or so into the flour. If you like yours plain, omit the fruits.

I tried two recipes, one with egg and the other without. After tasting both I decided they both tasted almost the same. So here are the recipes if you want to give it a try.


Scones
source: BBC Food recipes

225g/8 oz self raising flour
55g/2 oz butter
25g/1 oz castor sugar (about 1 Tbsp)
150 ml milk
(to glaze: 1 egg - optional. Brushing the tops with milk is fine)
(50g dried fruit - I added raisins, it is optional)


Method
In a bowl rub the butter into the flour until mixture resembles bread crumbs.
Stir in the sugar and the dried fruit if using.
Then add the milk until you get a soft sticky dough.
*I added a bit more milk to mine as it was dry.
Turn on to a floured work surface and knead lightly.
Gently pat out a round about 3cm thick.
Using a biscuit cutter, cut out the scones. Just press down
onto the dough and push out with your fingers lightly.
Arrange scones onto a greased oven tray.
Brush top with egg or milk.
Bake for 15 - 20 min at 180 - 200 C, depending on your oven.
Cool on a wire rack. Serve with your favorite jam or whipped cream.


Mary's Tea Time Scones
source: BBC Food Recipes & Mary Berry

250g/9 oz self raising flour
1 tsp baking powder
40g/1 1/2 oz butter
25g/1 oz castor sugar
1 egg
about 100 ml milk

Method
Put the flour and baking powder into a bowl.
Add in the butter and rub it in the flour until the mixture resembles bread crumbs.
Stir in sugar.
Beat the egg in a measuring jug and pour enough milk until 100ml.
*For this I also added a few tablespoonful more of milk as my dough was dry
Set aside 1 Tbsp for glazing the scones later.
Turn the  mixture out onto a floured surface and pat a round about 2 cm thick,
Use a biscuit cutter to cut out the scones.

Place the scones on a greased oven tray and brush the tops with the leftover milk/egg mixture.
Bake the scones for 10 min at 190-200 C.

Cool on a wire rack and serve with jam or whipped cream.


Happy Baking.


Sunday, 7 September 2014

Victoria Sandwich Cake

Baked this lovely all time favorite of the family and masses, Victoria Sandwich Cake.
I barely popped it out of the tins, it was still warm and Mum wanted to know if she could have a piece!
Not yet, said I as it has to cool slightly before I spread the jam and topped the other half over it!
As requested, I made the second half of chocolate.
Simply really, just add 1 Tbsp of cocoa powder with just enough water to form a paste.
Then add that to half of the batter.
Stir well to ensure all the 'white' turns chocolate.

If you want to try this lovely recipe for tea or just to eat cake, go here


Happy Baking!